 Subscribe
 Follow Us
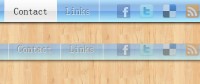
MagicLine Navigation with jQuery
 13 years ago
  16123
16123  3281
3281
 n/a
n/a

These “sliding” style navigation bars have been around a while,Turns out it’s really pretty darn easy. I put two examples together for it.
The Idea
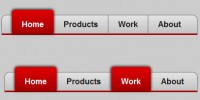
The idea is to have a highlight of some kind (a background or an underline) follow you around as you mouse over the different links in the navigation. This will happen with jQuery and it’s animation abilities. As such, the “magic line” will only be appended via JavaScript. Once added to the list and styled, as you mouse over the different links, it figures out the left positioning and the width and animates to match.
HTML
Typical list here…. It has the “group” class because it’s going to be a horizontal row and will need the clearfix so it has height. The ID is for the JavaScript to target it.
<div class="nav-wrap">
 <ul class="group" id="example-one">
    <li class="current_page_item"><a href="#">Home</a></li>
    <li><a href="#">Buy Tickets</a></li>
    <li><a href="#">Group Sales</a></li>
    <li><a href="#">Reviews</a></li>
    <li><a href="#">The Show</a></li>
    <li><a href="#">Videos</a></li>
    <li><a href="#">Photos</a></li>
    <li><a href="#">Magic Shop</a></li>
 </ul>
</div>
Notice the .nav-wrap div around it. That is used because of the styling, the bars go full width of the screen the but the navigation is centered within. This centering brings up an issue when we start the JavaScript.
CSS
Do the ol’ inline list elements with floated left anchors to get the list horizontal and avoid stairstepping. The magic line is absolutely positioned under the bar, so that it doesn’t cause jitter (mouse over a link, animates over, mouse is now on magic line not the link, animates back, etc.) Everything else is purely stylistic.View the complete css
.nav-wrap { margin: 50px auto;  background-color: rgba(0,0,0,0.6); border-top: 2px solid white; border-bottom: 2px solid white; }
#example-one { margin: 0 auto; list-style: none; position: relative; width: 960px; }
#example-one li { display: inline; }
#example-one li a { color: #bbb; font-size: 14px; display: block; float: left; padding: 6px 10px 4px 10px; text-decoration: none; text-transform: uppercase; }
#example-one li a:hover { color: white; }
#magic-line { position: absolute; bottom: -2px; left: 0; width: 100px; height: 2px; background: #fe4902; }
jQuery JavaScript
- When DOM is ready…
- Set up variables including current left offset of the navigation
- Set up resize function on the window to reset that offset should it change (because of the centering)
- Append the magic line to the nav
- Set up position and width of the magic line for the current page item
- Also set the original width and position as data, so it can be used to animate back to
- On hover, calculate the new width and new left position and animate to it
- On the hover callback (mouse out), animate back to original
Updated, thanks to smart comments by Daniel and Nora Brown below.
$(function() {

    var $el, leftPos, newWidth,
        $mainNav = $("#example-one");

    $mainNav.append("<li id='magic-line'></li>");
    var $magicLine = $("#magic-line");

    $magicLine
        .width($(".current_page_item").width())
        .css("left", $(".current_page_item a").position().left)
        .data("origLeft", $magicLine.position().left)
        .data("origWidth", $magicLine.width());

    $("#example-one li a").hover(function() {
        $el = $(this);
        leftPos = $el.position().left;
        newWidth = $el.parent().width();
        $magicLine.stop().animate({
            left: leftPos,
            width: newWidth
        });
    }, function() {
        $magicLine.stop().animate({
            left: $magicLine.data("origLeft"),
            width: $magicLine.data("origWidth")
        });
    });
});
As always, feel free to do whatever you want with it.
You might also like

Tags
accordion accordion menu animation navigation animation navigation menu carousel checkbox inputs css3 css3 menu css3 navigation date picker dialog drag drop drop down menu drop down navigation menu elastic navigation form form validation gallery glide navigation horizontal navigation menu hover effect image gallery image hover image lightbox image scroller image slideshow multi-level navigation menus rating select dependent select list slide image slider menu stylish form table tabs text effect text scroller tooltips tree menu vertical navigation menu