 Subscribe
 Follow Us
Useful and Practical jQuery Image ToolTips
 13 years ago
  42827
42827  13416
13416
 n/a
n/a
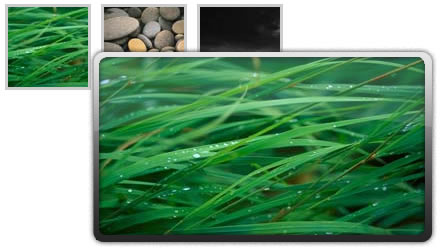
It displays a tooltip image when user hover on the thumbnail with fadein and out effect. it's a useful script for your website.
1. HTML
I have been thinking of using UL list, but then I think it's not really appropriate because it would be quite difficult to style. Therefore, we will be using a DIV instead.
The structure is pretty simple, a DIV.thumbnail-item has two children - the thumbnail image and the tooltip.
Inside the DIV.tooltip we have an image and SPAN.overlay. The SPAN.overlay has the png image as the background image and it's moved to the top of the image.
<div class="thumbnail-item">
 <a href="#"><img src="images/small1.jpg" class="thumbnail" /></a>
 <div class="tooltip">
  <img src="images/big1.jpg" alt="" width="330" height="185" />
  <span class="overlay"></span>
 </div>
</div>
2. CSS
As usual, I have put comments on every important CSS styling.
.thumbnail-item {
 /* position relative so that we can use position absolute for the tooltip */
 position: relative;
 float: left;
 margin: 0px 5px;
}

.thumbnail-item a {
 display: block;
}

.thumbnail-item img.thumbnail {
 border:3px solid #ccc;
}

.tooltip {
 /* by default, hide it */
 display: none;
 /* allow us to move the tooltip */
 position: absolute;
 /* align the image properly */
 padding: 8px 0 0 8px;
}

 .tooltip span.overlay {
  /* the png image, need ie6 hack though */
  background: url(images/overlay.png) no-repeat;
  /* put this overlay on the top of the tooltip image */
  position: absolute;
  top: 0px;
  left: 0px;
  display: block;
  width: 350px;
  height: 200px;
 }
3. Javascript
We will be using mouseenter, mousemove and mouseleave events in this tutorial.
- Mouse Enter : Calculate the position of the tooltip based on the mouse pointer's axis. After that, set the z-index so that it has the highest z-index among the rest of the thumbnails and then set the position of the tooltip and display it.
- Mouse Move : Everytime you move and hover on the top of the thumbnail, the script will calculate the position of the tooltip based on the mouse pointer's axis and update the tooltip position.
- Mouse Leave : Reset the z-index and hide the tooltip
// Load this script once the document is ready
$(document).ready(function () {

 // Get all the thumbnail
 $('div.thumbnail-item').mouseenter(function(e) {

  // Calculate the position of the image tooltip
  x = e.pageX - $(this).offset().left;
  y = e.pageY - $(this).offset().top;

  // Set the z-index of the current item,
  // make sure it's greater than the rest of thumbnail items
  // Set the position and display the image tooltip
  $(this).css('z-index','15')
  .children("div.tooltip")
  .css({'top': y + 10,'left': x + 20,'display':'block'});

 }).mousemove(function(e) {

  // Calculate the position of the image tooltip
  x = e.pageX - $(this).offset().left;
  y = e.pageY - $(this).offset().top;

  // This line causes the tooltip will follow the mouse pointer
  $(this).children("div.tooltip").css({'top': y + 10,'left': x + 20});

 }).mouseleave(function() {

  // Reset the z-index and hide the image tooltip
  $(this).css('z-index','1')
  .children("div.tooltip")
  .animate({"opacity": "hide"}, "fast");
 });

});
You might also like

Tags
accordion accordion menu animation navigation animation navigation menu carousel checkbox inputs css3 css3 menu css3 navigation date picker dialog drag drop drop down menu drop down navigation menu elastic navigation form form validation gallery glide navigation horizontal navigation menu hover effect image gallery image hover image lightbox image scroller image slideshow multi-level navigation menus rating select dependent select list slide image slider menu stylish form table tabs text effect text scroller tooltips tree menu vertical navigation menu