 Subscribe
 Follow Us
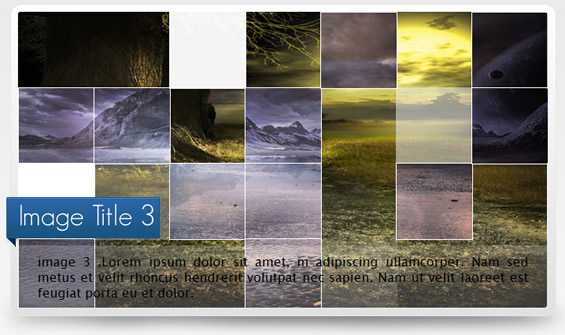
a Brilliant Mask Transition Slideshow With jQuery
 13 years ago
 20647
20647 4108
4108
Setting up workspace for the plugin.
Before we can move forward, there are few things we need to look at.
- We will keep our presentation separated from logic, so we will create a css file jMask.css for styling and javascript file jMask.js for logic purposes.
- Looking at the concept on how slideshow works.
- Concept behind our Mask transition effect.
How slideshow works ?
Basically every slideshow has a mechanism to iterate each image to front after an effect like fade is over. So in our plugin we will create a function that pushes each image to the front. Since images are stacked up, we will alter the z-index property of each li element to push the images to the front.
Concept behind the transition -
Since it is a mask transition, the main concept is put an element infront of the fading square, then fade out the square to give the masking effect. So what we are going to do is create an array of square divs of smaller size with the topmost image as the background image. We will adjust the background position of each div so that the the whole array of divs looks like same as the top image itself.
Then finally we will randomly choose a div, insert a div with a white background (you can choose yourself) at the current div position and when the mask div appears on top of the current div, we will remove the current div and fadeOut the mask div. We will repeat this procedure for all the divs available. Kinda of tricky, don’t worry when we will code the function you will get the point more easily.
HTML structure for usage
In the first part, we had created a structure for our slideshow, all the images and their correspond description were wrapped inside an unordered list. Which was then wrapped inside two divs. We will keep that in mind and create the plugin to handle them.
The CSS part -
Before we can start coding our plugin, we will style our slideshow a bit. All the images need to be at the top of each other, so we can iterate them later. So we will absolute position the elements and hide unnecessary area besides the length and width of the slideshow.
.active { position:absolute;z-index:10; } /* Class for element at top  */
.reset{ position:absolute;z-index:4;  } /* Class for the rest of the elements  */

#jMask-stage ul { list-style:none; display:block; margin:0px; padding:0px; float:left; }
#jMask-stage ul li { position:absolute; display:block; overflow:hidden;  }
#jMask-stage ul img { position:absolute;  }
Here we have styled all the elements within the scope of jMask-stage to avoid conflict with other elements of the page. We will wrap the ul later with jMask-stage.
Here .active class represents the image at the top of the slideshow and reset represents the images behind the main image.
Make sure that you have resetted the margin and padding of the elements to avoid unecessary gaps in the slideshow.
Step 1 – Creating the initial structure
We will start off by creating a basic plugin for jquery and wrap it in a function to prevent conflict with other plugins.
(function($) {

$.fn.jMask = function(options){

 };

    })(jQuery);
Step 2 – Plugin options
A plugin should have lots of options to make it flexible as possible, here we will use 6 options.
- time – time is the duration each image should persists.
- width – width is the width of the slideshow.
- height – height is the height of the slideshow
- bg – is the color that apppears as mask in the transition, by default is white.
- border – border is the border of the squares that occur during transition effect.
- callback – A callback function is executed when a transition ends.
(function($) {

$.fn.jMask = function(options){
 var defaults = {time:7000,width:600,height:500,bg:'#ffffff',border:'1px solid #ffffff',callback:function(){  } };
 var options = $.extend(defaults, options);
 };

    })(jQuery);
Step 3 – Precaching variables.
It is a good practice to limit the use of $ and store the variables commonly used. Also when creating a plugin, it is best to wrap the widget in a div with plugin’s name as id to avoid conflict( Since we already have a div here so we will change it’s id).
var root = $(this);
var ul = root.find("ul:first");
var li = ul.find("li");
var images = li.find("img");
root.find("div").attr("id","jMask-stage");
Step 4 – Modularizing the plugin.
It is a good practice to modularize the plugin, so that in the future if upgrade is necessary only the required module can be changed without altering the whole plugin. We will be needing the following modules for our current plugin.
- A module to flip images (necessary for all slideshows).
- A module to initialize the main effect.
- A module to create the mask transition effect.
- Finally a module to generate random numbers for the transition effect.
Step 5 – Declaring variables to be used in the plugin.
Now we will declare variables that we will use in the plugin.
var list_array = $.makeArray(li);
var image_timer,arr,index,block,w,h,src,parent,im;

li.css({"width":options.width,height:options.height,display:"block"});
$("#jMask-stage").css({"width":options.width,height:options.height});
$(list_array[list_array.length-1]).find("span , h1,p").show();
Here we have converted the li items into an array so that we can use them in the increment (flipping images) module. Finally we will set the height and width parameters of the slideshow and show the image description of the last image.
You should note that we are showing the image description of last image because our slideshow starts from last image and goes anticlockwise.
Step 6 – Creating an increment function
Every slideshow needs a mechanism to flip the images after any effect. The basics of this is by changing the z-index of each images, after each transition. So here we are going to create a incrementz function which flips the li items.
function incrementz()
 {

 var th,sr,temp =  list_array.pop();
 list_array.unshift(temp);
 if($(list_array[0]).hasClass('active'))
  $(list_array[0]).toggleClass('active reset');
  $(list_array[0]).find("span , h1,p").hide();
  $("#ribbon-left").hide();

  $(list_array[list_array.length-1]).toggleClass('active reset');
   $(list_array[list_array.length-1]).find("span , h1,p").show();
   $("#ribbon-left").show();
  $(list_array[list_array.length-2].firstChild).css({display:"block",opacity:1.0});
  $(list_array[list_array.length-1].firstChild).css({display:"block",opacity:1.0});

 options.callback(list_array[list_array.length-1].firstChild);
 };
Here what we are doing is that since we start from the last li, after each transition we will pop the item and insert it in the first place. Now the first item will be always the one, on which effect has been done and last element of the array will be the item coming next. So we will remove active class of the first item and add it to the last item. This way each element iterates through the array as well as in the slideshow. Finally we will make sure the images that are gone after effect are visible. We will also call the callback with the current image(last one) as parameter.
Step 7 – Creating the actual effect.
Now we will create the actual effect. Since we have seen how the transition works, now we will implement the logic.
Here first we will get the reference of the image in the im variable, then we calculate the width and height of the squares which are relative to the dimensions of the slideshow. You can give them absolute values. After that we have create a div block with top image as the background image. Then we will create our mask div and then insert the array of divs in the images’s parent while constantly changing their background position.
 function cubeout(image)
 {
   im = $(image);
   w = Math.floor(options.width/7);
   h = Math.floor(options.width/7);
   parent = im.parent();
   arr = new Array();
   i =0;
   j =0;
   var index = 0;
   src = im.attr("src");
   block = $("
<div>",{
     css:{
      position:"absolute",
      width:w,
      height:h,
      'background-image':'url('+src+')',
      'background-color':options.bg,
      'border':options.border

      }

       });
   var temp,mask = block.clone();
   mask.css({'background-image':'',display:"none"});
   while(i<options.width)
   {

      j=0;
   while(j<options.height)
   {

    arr[index] = block.clone().css({left:i ,top:j,backgroundPosition:-i+"px "+-j+"px" });
    parent.append(arr[index++]);
   j = j + h;
   }

   i = i + w;
   }

      }
Now we are going to append the mask div and then call a function to start fading out the divs. We will initialize i to 0 for indexing our div array.
Here we have used a 500 millsec delay because IE8 is not as fast as other browsers and the animation lags behind. Then we are going to get an array of random nos to randomly fadeout divs.
   i=0;
var pos;
parent.append(mask);
setTimeout(function(){ im.hide(); doit(); },500);

var random_no = random_array(arr.length);
Step 8 – Creating the fading out function.
So far we have added the divs, inserted the mask div. Now we will fade out the divs randomly. So what we are going to do is create a timer and in that -
- First we will check the if i is greater than array length,then all divs are have been faded out so we will clear out the timer. After a delay of 2 sec (so that all divs fade out before we call incrementz() ) we will increment our images and call the effects function in the time interval defined in the options.
- After the checking block, we will store the position of the current random div and insert a clone mask at that place.
- After inserting the mask div, we will fade it in ,then remove the mask div and fade out the image div. This will give it the mask effect.
 function doit(){

 var timer = setInterval(function(){

  if(i>=arr.length)
  {

   clearInterval(timer);
     setTimeout(function(){
         incrementz();

        },2000)
   image_timer = setTimeout(function() {
                effects(); },options.time);

  }

   pos = $(arr[random_no[i]]).position();

  if(pos!=null){
  temp = mask.clone().css({top:pos.top,left:pos.left});
  temp.fadeIn(300,function(){
            $(arr[random_no[i]]).css('background-image','');
            $(this).remove();
            $(arr[random_no[i++]]).fadeOut(700,function(){

              $(this).remove();

               });

            });

  }

         },90);

 };
};
Step 9 – creating the effect module
The transition should not be called directly. So we will create a function effects that is called after the mask transition is over. Note that in the cubeout function we are passing the image as parameter( firstChild).
function effects()
 {

  cubeout(list_array[list_array.length-1].firstChild);
 };
Step 10 – creating the random number generator
Now we are going to create a function that generates an array of random numbers. We have used this in the cubeout function earlier.
function random_array(maxn)
 {

    var array = new Array();
 var temp,i,flag=true;
 var index =0;
  while(index<maxn)
  {
   flag = true;
   temp = Math.floor(Math.random() * maxn);
   for(i=0;i<array.length;i++)
   {
    if(temp==array[i])
    {
    flag=false;
    break;
    }
   }

   if(flag==true)
   array[index++] = temp;
  }

  return array;
 };
Step 11 – Making it work on all the browsers
On webkit browsers (chrome and safari) plugin sometimes behaves buggy because webkit loads js and css in parallel. This may cause some problems, so we will wrap our code inside a function proceed and we will check if the browser is a webkit one then call the proceed function after the window has been loaded else call the function straight away.
Step 12 – calling the effect funtion
Finally we will initialize our slideshow.
image_timer = setTimeout(function() {   effects(); },4000);
</pre>
<h3>Final Code</h3>
Finally our code looks like -

<pre lang="javascript">
 (function($) {

$.fn.jMask = function(options){
 var defaults = {time:7000,width:600,height:500,bg:'#ffffff',border:'1px solid #ffffff',callback:function(){  } };
 var options = $.extend(defaults, options);
 var root = $(this);

 var ul = root.find("ul:first");
 var li = ul.find("li");
 var images = li.find("img");

  root.find("div").attr("id","jMask-stage");

  if($.browser.webkit)
  {
   $(window).load(function(){ proceed(); });
  }
 else
  proceed();

 function proceed(){

 var list_array = $.makeArray(li);
 var image_timer,arr,index,block,w,h,src,parent,im;

 li.css({"width":options.width,height:options.height,display:"block"});
 $("#jMask-stage").css({"width":options.width,height:options.height});

  $(list_array[list_array.length-1]).find("span , h1,p").show();

  function incrementz()
  {

  var th,sr,temp =  list_array.pop();
  list_array.unshift(temp);
  if($(list_array[0]).hasClass('active'))
   $(list_array[0]).toggleClass('active reset');
   $(list_array[0]).find("span , h1,p").hide();
   $("#ribbon-left").hide();

   $(list_array[list_array.length-1]).toggleClass('active reset');
    $(list_array[list_array.length-1]).find("span , h1,p").show();
    $("#ribbon-left").show();
   $(list_array[list_array.length-2].firstChild).css({display:"block",opacity:1.0});
   $(list_array[list_array.length-1].firstChild).css({display:"block",opacity:1.0});

  options.callback(list_array[list_array.length-1].firstChild);
  };

  function effects()
  {

   cubeout(list_array[list_array.length-1].firstChild);
  };

 function cubeout(image)
 {
   im = $(image);
   w = Math.floor(options.width/7);
   h = Math.floor(options.width/7);
   parent = im.parent();
   arr = new Array();
   i =0;
   j =0;
   var index = 0;
   src = im.attr("src");
   block = $("
<div>",{
     css:{
      position:"absolute",
      width:w,
      height:h,
      'background-image':'url('+src+')',
      'background-color':options.bg,
      'border':options.border

      }

       });
   var temp,mask = block.clone();
   mask.css({'background-image':'',display:"none"});
   while(i=arr.length)
   {

    clearInterval(timer);
      setTimeout(function(){
                   incrementz();

         },2000)

      image_timer = setTimeout(function() {

                  effects(); },options.time);

   }

    pos = $(arr[random_no[i]]).position();

   if(pos!=null){
   temp = mask.clone().css({top:pos.top,left:pos.left});
   temp.fadeIn(300,function(){
             $(arr[random_no[i]]).css('background-image','');
             $(this).remove();
             $(arr[random_no[i++]]).fadeOut(700,function(){

               $(this).remove();

                });

             });

   }

          },90);

  };
 };

 image_timer = setTimeout(function() {   effects(); },4000);

 }

}

function random_array(maxn)
 {

    var array = new Array();
 var temp,i,flag=true;
 var index =0;
  while(index<maxn)
  {
   flag = true;
   temp = Math.floor(Math.random() * maxn);
   for(i=0;i<array.length;i++)
   {
    if(temp==array[i])
    {
    flag=false;
    break;
    }
   }

   if(flag==true)
   array[index++] = temp;
  }

  return array;
 };

    })(jQuery);
Putting it all together.
Finally our plugin is ready to use. Just import the css file and our plugin. Usage is just like any other jquery plugin.
$("#slideshow").jMask({width:680,height:380});
You might also like


Tags
accordion accordion menu animation navigation animation navigation menu carousel checkbox inputs css3 css3 menu css3 navigation date picker dialog drag drop drop down menu drop down navigation menu elastic navigation form form validation gallery glide navigation horizontal navigation menu hover effect image gallery image hover image lightbox image scroller image slideshow multi-level navigation menus rating select dependent select list slide image slider menu stylish form table tabs text effect text scroller tooltips tree menu vertical navigation menu