 Subscribe
 Follow Us
motools tabs effect
 13 years ago
 10135
10135 1978
1978
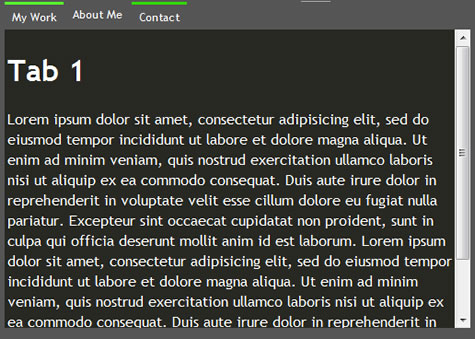
MooTabs is a tiny(3kb) class for MooTools. As the name suggests, it's main purpose is to help out with the creation of simple tab navigation.
As of version 1.2, you can also set tab content via an Ajax request. See the documentation below for more info!
What's new?
Version 1.2
The big change in version 1.2 is the new Ajax Tabs option! You can now retrive tab content via Ajax. Check out the documentation below to learn more about it!
Also, there are 2 new methods, mootabs.getNext() and mootabs.getPrevious(), again, check out the docs below! Although it's pretty self-explanatory!
Some differences to note in the parameters:
-"height" and "width" options has been changed from Integer to String so you can use width like "300px" or "50%" depending on what you need.
-new option: "duration", an integer that consists of the duration of the animation on tab switch.
-new option: "activateOnLoad", a string, can be set to 'first', 'none' or any tab's title, this is the tab that will be activated on first load.
-new parameter to the "mootabs.activate()" method, called "skipAnim". It's an optional parameter and the default is set to false. As you might have guessed, if set to true, there will be no animation on tab switching.
Version 1.1
Good question! ;) Obviously, MooTabs is now using MooTools 1.1 instead of 1.0. As far as feature goes, it's still pretty much the same, but you now have the "mouseOverClass" option, to customize the look of a mousedover tab. Also, new to 1.1 is the option to use 'none' as a changeTransition, which allows you to switch tabs without any effects/transition.
The code was completely re-written from scratch. MooTabs 1.0 was the first piece of Javascript I wrote so it was buggy. It should now be faster, makes better use of MooTools, and it's overall a better piece of code!
One thing to notice: In version 1.1 you use the list item's title attribute to link the tab to it's respective panel, instead of an anchor, as it was the case in version 1.0
Documentation
What to include
MooTabs is very easy to use, all you have to do is to include MooTools 1.1 as you usually do, next, include mootabs1.2.js and finally, load the CSS file you want to use.
For Example:
      <link rel="stylesheet" href="mootabs1.2.css" type="text/css" media="screen" title="no title" charset="utf-8" />
      <script src="mootools.v1.1.js" type="text/javascript" charset="utf-8"></script>
      <script src="mootabs1.2.js" type="text/javascript" charset="utf-8"></script>
The HTML part
Now comes the html markup. Again, it's pretty straight forward. The tabs consist of:
1) A main DIV (ID can be anything, but remember it!)
2) An unordered list (Class has to be set to "mootabs_title")
3) A set of DIV that will become the Tab Panels (Class has to be set to "mootabs_panel")
Here's a concrete example, I will go into details about each part after.
      <div id="myTabs">
      <ul>
      <li title="Tab1">Tab 1 Label</li>
      <li title="Tab2">Tab 2 Label</li>
      <li title="Tab3">Tab 3 Label</li>
      </ul>
      <div id="Tab1">
      Tab 1 Content
      </div>
      <div id="Tab2">
      Tab 2 Content
      </div>
      <div id="Tab3">
      Tab 3 Content
      </div>
      </div>
1) The main DIV is the container of the whole tab interface, nothing really fancy here, as long as you remember the ID you gave it. (Line 1 in the example)
2) The unordered list consist of the Tabs themselves (i.e. NOT the panels, but the clickable tabs). To associate a Tab with it's Panel, you have to define the "title" attribute of the list item (<li>). The title of the <li> element needs to be the same as the ID of the panel linked to it. The label of the Tab is the innerHTML content of the list item. (Lines 2 to 6 in the example)
3) The set of divs consists of your tab panels. The class has to be set to "mootabs_panel" and the ID of the panel has to be the same as the list item (<li>)'s title. (Lines 7 to 15 in the example)
The Javascript Part
This is probably the easiest part. All you have to do here is to declare a new "mootabs" object with the parameters that you want (I will give a list don't worry). Make sure you declare the object AFTER the DOM is ready, so eighter in the Body after your main DIV container, or, what I would strongly suggest, inside the <head>, using the domread events of MooTools.
The following example demonstrate it:
      <script type="text/javascript" charset="utf-8">
      window.addEvent('domready', init);
      function init() {
      myTabs1 = new mootabs('id_of_container', {options});
      }
      </script>
Place the previous code in the <head> of your document, after the include part.
A full list of possible options/parameters will be given below.
The Style(CSS) part
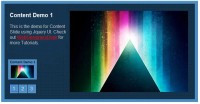
This might be the trickiest part. Customizing the look of the tabs require a certain knowledge of CSS and I will not go into depth on that subject as the purpose of this page is not to give a full-blown CSS lesson. What I would suggest though is to look at the 3 examples of tabs on this page (see the Demo In Action section), they each use a different CSS file that you can download and they should be a good starting point.
Some important classes to keep in mind:
-mootabs_title: the base class for the unordered list, not much to do here
-mootabs_title li: the class for the li elements of the unordered list, this one is fun to mess with...
-mootabs_title li.active: the class for the currently active tab, again, have fun with this one...
-mootabs_panel: the class for the panel divs, note that you have to leave "display:none" there since the tabs are hidden by default!
-mootabs_panel.active: the class for the active panel div, again leave the "display:block" here so the panel shows up when it's activated! Feel free to mess with the colors, font etc..
In most cases, you can play with the fonts and colors without any consequences, but if you start messing with the position, display, height, etc.. I can't guarantee that the result will look good (or that it will work at all!). This is why I would suggest you to read up a bit on CSS if you are new to it, before you start styling the tabs.
A quick word on Ajax
If you wish to use Ajax to retrive tab's content, you have to keep the following in mind; what the script will do is to make an ajax request (via GET) to the url you specified in the options, with the GET parameter "tab" containing the tab's title.
For example, if your tab is titled "Tab2", the script will send a GET request with the following parameter "?tab=Tab2"
So in your server-side script/controller, all you have to do is to catch the value of the GET parameter named "tab", you can then supply the requested content.
I really don't want to insist to much on the method to proceed here since everyone works differently (and of course it also depends if your server-side script is in PHP, ASP or anything else...) but I suggest you take a look at the Ajax Example above and look at it's source to get a better grasp at the concept.
Parameters/Options
Parameters
-Id of Container: This is the ID of your main DIV container
-Options: Described Below...
Options
-width: String, the width of the main DIV container. Changed as a string so you can use "200px" or "200%" if you want. (Default: '300px')
-height: String, the height of the main DIV container. Not recommended to use a % height here as it will most likely come out ugly (Default: '200px')
-changeTransition: An Fx.Transitions object or the string 'none' for no effects (Default: Fx.Transitions.Bounce.easeOut)
-duration: Integer, the duration of the animation (Default: 1000)
-mouseOverClass: String, The CSS Class name you want to use when a tab is mousedover (Default: 'active')
-activateOnLoad: String, can be set to 'first' to activate the first tab on load, 'none' to leave all the tabs hidden on load, or any tab's title to activate this tab on load (Default: 'first')
-useAjax: Boolean, Whether you want to use Ajax to retrive tab content or not. (Default: false)
-ajaxUrl: String, The url of the server-side script to use.
-ajaxOptions: Object, The object containing the options for the Ajax request (Default: {method:'get'}).
-ajaxLoadingText: String, The text to show while content is loading (Default: 'Loading...').
If you wish to use Ajax, please leave the method to GET and don't change the "update" option. Also, feel free to use a cool ajax spinner image in the ajaxLoadingText if you want, it can take HTML...
Here's an example using all the options:
      myTabs1 = new mootabs('myTabs', {
      width: '300px',
      height: '250px',
      changeTransition: Fx.Transitions.Back.easeOut,
      duration; 1000,
      mouseOverClass: 'over',
      activateOnLoad: 'first',
      useAjax: true,
      ajaxUrl: 'php/myScript.php',
      ajaxOptions: {method'get'},
      ajaxLoadingText: 'Loading...'
      });
Methods
mootabs.addTab(title, label, content)
Used to add a new tab via Javascript.
3 Parameters (Required):
-title: String, The title attribute of the listitem elements
-label: String, The innerHTML attribute of the listitem elements (i.e. The tab label)
-content: String, The innerHTML attribute of the panel. (i.e. The panel's content)
mootabs.removeTab(title)
Used to remove a tab via Javascript
1 Parameter (Required):
-title: String, The title attribute of the listitem elements
mootabs.activate(title, skipAnim=false)
Used to activate a tab via Javascript
2 Parameter:
-title: String, The title attribute of the listitem elements, Required
-skipAnim: Boolean, Whether to skip the animation or not on tab change(Optional, Default: false)
mootabs.next()
Activate the next tab. No parameters required.
mootabs.previous()
Activate the previous tab. No parameters required.
Here is an example using all the methods:
//adding a tab
myTabs1.addTab('Tab4', 'Tab 4 Label', 'Content of tab4');
//activating this tab
myTabs1.activate('Tab4');
//removing this tab
myTabs1.removeTab('Tab4');
//moving to the next tab
myTabs1.next();
//moving to the previous tab
myTabs1.previous();
You might also like


Tags
accordion accordion menu animation navigation animation navigation menu carousel checkbox inputs css3 css3 menu css3 navigation date picker dialog drag drop drop down menu drop down navigation menu elastic navigation form form validation gallery glide navigation horizontal navigation menu hover effect image gallery image hover image lightbox image scroller image slideshow multi-level navigation menus rating select dependent select list slide image slider menu stylish form table tabs text effect text scroller tooltips tree menu vertical navigation menu