 Subscribe
 Follow Us
simple useful tool tip jquery plugin
 13 years ago
 16118
16118 4040
4040
The article source:http://labs.unitinteractive.com/unitip.php
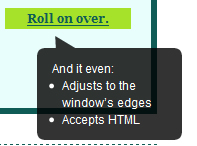
This tooltips supports all browsers, is easy to deploy, and is surprisingly light-weight. Best of all: it offers you the opportunity to customize it to work well with any of your projects.
- Vertically expands to content.
- UniTip can accept HTML.
- You can apply UniTip to specific classes or tags.
- Adjusts to sides and bottom of page.
- Unit PNG Fix included in the zip to automatically fix pngs for IE6.
- Easy to customize and deploy! Friendly with other scripts!
add the following code to your page header [make sure the paths reflect your folder structure]:
<script type="text/javascript" src="unitip.js"></script>

<link href="css/unitip.css" rel="stylesheet" type="text/css" />
UniTip uses transparent pngs by default, so make sure you deploy the Unit PNG fix, as well. Then add “unitip.css” to your css folder.
You can use the files provided in this zip’s images folder (referenced in the above code), or use your own images.
This is the pointy part. The uniTip uses background position to serve up the correct part of this image depending on where the point should be eminating.
This is the rounded cap. The uniTip uses background position to serve up the correct part of this image depending on if the cap is top or bottom. Feel free to use your own images, but just follow this structure to ensure that the tip looks correct when adjusting to the browser edges.
Next open up unitip.js, and at the top, add the info needed. The first set of variables pertains to what the tooltip will appear on:
var uniTipTag = "a,img"; - Defines the tags that the tooltip will be applied to. Separate with a comma and no spaces.

var uniTipClass = "TipEx"; - Defines the classes that the tooltip will be applied to. If left blank, the tooltip will apply to all instances of the tags from above.
The second set of variables defines the tool tip’s offset from the cursor:
var uniTipX = 0; - Horizontal offset from the cursor.

var uniTipY = 15; - Vertical offset from the cursor.
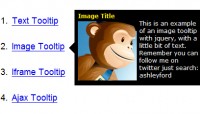
Now, add the tooltip content you want for each element in the title attribute for links and the alt attribute for images. Note that when using HTML in the tooltip content, page readers will have a difficult time diciphering it. View source on this page to see examples. Lastly, make sure that the image paths you have designated have all the correct images, and you should be done.
You might also like

Tags
accordion accordion menu animation navigation animation navigation menu carousel checkbox inputs css3 css3 menu css3 navigation date picker dialog drag drop drop down menu drop down navigation menu elastic navigation form form validation gallery glide navigation horizontal navigation menu hover effect image gallery image hover image lightbox image scroller image slideshow multi-level navigation menus rating select dependent select list slide image slider menu stylish form table tabs text effect text scroller tooltips tree menu vertical navigation menu