 Subscribe
 Follow Us
Horizontal Accordion menu with jQuery
 13 years ago
 28161
28161 3797
3797

Up until now I have always used Scriptaculous / Prototype for any JavaScript animation and effects, but lately I’ve heard a lot of good things about jQuery. So, I thought I would give it a try, and start doing some experiments.
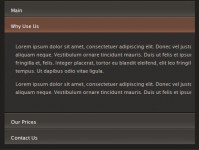
In this example, we have created an accordion effect that reveals a caption for each thumbnail.
In order to use jQuery in your pages you first need to download the latest release and then include the JavaScript library within your head tags.
<script src="javascript/jquery-1.2.3.js"
type="text/javascript"></script>
Now lets take a look at the html for this example. I gave the first anchor tag an id, so that we could set an initial width and make it appear expanded when the page is loaded.
<ul>
  <li>
    <a id="a1">
      <img src="images/free_thumb.jpg" />
      <p>
        <strong>Freebies</strong><br/>
        Download free files to make your job easier.
      </p>
    </a>
  </li>
  <li>
    <a>
       <img src="images/tut_thumb.jpg" />
       <p>
         <strong>Tutorials</strong><br/>
         Tips and tricks to help you
         keep up with the latest technology.
       </p>
    </a>
  </li>
  <li>
    <a>
      <img src="images/inspire_thumb.jpg" />
      <p>
        <strong>Inspiration</strong><br/>
        Get inspired by what other designers are doing.
      </p>
    </a>
  </li>
</ul>
Here is the CSS, which is pretty straight forward. The main thing to note is the fixed height being set on the anchor tag. Doing this along with “overflow: hidden” prevents the contained p tag from dropping down below the thumbnail.
ul{
  list-style: none;
  margin: 0;
  padding: 0;
}

ul li{
  float: left;
  padding: 10px;
  display: block;
  margin-right: 10px;
}

ul li a{
  display: block;
  overflow: hidden;
  height: 75px;
  width: 75px;
}

#a1{
  width: 210px;
}

ul li img{
  position: absolute;
  border: 3px solid #881212;
}

ul li p{
  margin: 0;
  padding: 0;
  width: 120px;
  display: block;
  margin-left: 85px;
}
And here is the jQuery script that makes it all happen. This can be placed in the head tag. The first thing we do is set a few initial variables: lastBlock represents the block that is already expanded, maxWidth is the width we want our block to be when it is expanded, and minWidth is the width when it is not expanded.
Then we simply set a hover event on all anchor tag contained within all list items. Within the hover event we make two calls of the animate() function: one to close the lastBlock, and another to expand the block we are hovering. Then we set lastBlock equal to the block we just expanded. That way jQuery will know which one to close the next time the hover event is fired. The animate() function allows you to create custom animations by setting new values for multiple properties. In this case we are only animating the width.
One important thing to note is setting “queue” to false. If it is set to true, every hover event is stored and will be animated one after another, resulting in opening and closing long after the last hover happens.
<script type="text/javascript" >
$(document).ready(function(){
    lastBlock = $("#a1");
    maxWidth = 210;
    minWidth = 75;

    $("ul li a").hover(
      function(){
        $(lastBlock).animate({width: minWidth+"px"}, { queue:false, duration:400 });
 $(this).animate({width: maxWidth+"px"}, { queue:false, duration:400});
 lastBlock = this;
      }
    );
});
</script>
You might also like

Tags
accordion accordion menu animation navigation animation navigation menu carousel checkbox inputs css3 css3 menu css3 navigation date picker dialog drag drop drop down menu drop down navigation menu elastic navigation form form validation gallery glide navigation horizontal navigation menu hover effect image gallery image hover image lightbox image scroller image slideshow multi-level navigation menus rating select dependent select list slide image slider menu stylish form table tabs text effect text scroller tooltips tree menu vertical navigation menu