 Subscribe
 Follow Us
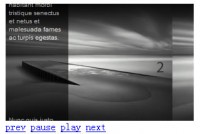
Slick Auto-Playing Featured Content Slider(jQuery )
 13 years ago
 30975
30975 5802
5802

Functionality Checklist
The Coda Slider was 90% there already. There is a main content area (panels, if you will), which slide from left to right each with different unique content. There is generally a set number of panels, but the code is written in such a way that adding or removing panels isn’t a huge pain. There are links which act as navigation to quickly jump to any particular panel. These links can be anything (text hyperlink, thumbnail, etc) and link to a unique hash value URL (each panel has a unique URL if need be). Coda Slider provides all of this out of the box.
The HTML
Here is the framework HTML for just the slider itself:
<div class="slider-wrap">
 <div id="main-photo-slider" class="csw">
  <div class="panelContainer">

   <div class="panel" title="Panel 1">
    <div class="wrapper">
     <!-- REGULAR IMAGE PANEL -->
     <img src="images/tempphoto-1.jpg" alt="temp" />
     <div class="photo-meta-data">
      Photo Credit: <a href="http://flickr.com/photos/astrolondon/2396265240/">Kaustav Bhattacharya</a><br />
      <span>"Free Tibet" Protest at the Olympic Torch Rally</span>
     </div>
    </div>
   </div>
   <div class="panel" title="Panel 2">
    <div class="wrapper">
     <!-- PANEL CONTENT -->
    </div>
   </div>
   <div class="panel" title="Panel 3">
</div>
The CSS
The full CSS for this example has a basic reset, some utility styles and basic structure. Below, I’ll just show you the CSS relevant to the slider itself, but you can view the full CSS here.
.slider-wrap      { width: 419px; position: absolute; top: 87px; left: 40px; }
.stripViewer .panelContainer
.panel ul      { text-align: left; margin: 0 15px 0 30px; }
.stripViewer      { position: relative; overflow: hidden; width: 419px; height: 285px; }
.stripViewer .panelContainer    { position: relative; left: 0; top: 0; }
.stripViewer .panelContainer .panel   { float: left; height: 100%; position: relative; width: 419px; }
.stripNavL, .stripNavR, .stripNav   { display: none; }
.nav-thumb       { border: 1px solid black; margin-right: 5px; }
#movers-row      { margin: -43px 0 0 62px; }
#movers-row div     { width: 20%; float: left; }
#movers-row div a.cross-link     { float: right; }
.photo-meta-data     { background: url(images/transpBlack.png); padding: 10px; height: 30px;
             margin-top: -50px; position: relative; z-index: 9999; color: white; }
.photo-meta-data span      { font-size: 13px; }
.cross-link      { display: block; width: 62px; margin-top: -14px;
             position: relative; padding-top: 15px; z-index: 9999; }
.active-thumb       { background: transparent url(images/icon-uparrowsmallwhite.png) top center no-repeat; }
Anything in there that starts with “.strip” is core to the slider itself, getting those panels set up and the wrapper around them, all the CSS magic needed to make a slider do its thing. From “.nav-thumb” on down is stuff specific to this example. The thumbnails have thin black borders. The meta-data section is pushed off the panel by the image, but then is forced back up with a negative top margin and a transparent black background applied.
The “.active-thumb” class is very important too, if a thumbnail has this class, it gets the special background applied, which is the white arrow we wanted to indicate the current panel. This class will get applied and removed in the JavaScript.
The JavaScript
In the header section of your HTML, you’ll need to include jQuery and all the plugin files. The bare minimum basics look like this:
<script type="text/javascript" src="js/jquery-1.2.6.min.js"></script>
<script type="text/javascript" src="js/jquery-easing-1.3.pack.js"></script>
<script type="text/javascript" src="js/jquery-easing-compatibility.1.2.pack.js"></script>
<script type="text/javascript" src="js/coda-slider.1.1.1.pack.js"></script>

<script type="text/javascript">
 $(function(){

  $("#main-photo-slider").codaSlider();

 });
</script>
That will activate the slider, but remember we have some extra functionality to get cooking here. Instead of altering the plugin itself, we can add the extras by writing our own little function on top of it. In essence, to achieve the “auto-play” effect, we are going to trigger a click event on the next thumbnail in line every 3 seconds. We’ll call the function “theInterval”, and we’ll need a couple of variables, so we’ll set those up first.
var theInt = null;
var $crosslink, $navthumb;
var curclicked = 0;

theInterval = function(cur){
 clearInterval(theInt);

 if( typeof cur != 'undefined' )
  curclicked = cur;

 $crosslink.removeClass("active-thumb");
 $navthumb.eq(curclicked).parent().addClass("active-thumb");
  $(".stripNav ul li a").eq(curclicked).trigger('click');

 theInt = setInterval(function(){
  $crosslink.removeClass("active-thumb");
  $navthumb.eq(curclicked).parent().addClass("active-thumb");
  $(".stripNav ul li a").eq(curclicked).trigger('click');
  curclicked++;
  if( 6 == curclicked )
   curclicked = 0;

 }, 3000);
};
We aren’t done yet though. We need to call our function, for one thing. But we also need to handle a manual click event on one of our thumbnails properly. We want a manual click event to use the same function, so that the “current” thumbnail can be reset properly and we don’t see any weird jumping around. Right after our function, we can now add this final code, to be fired when the DOM is ready:
$(function(){

 $("#main-photo-slider").codaSlider();

 $navthumb = $(".nav-thumb");
 $crosslink = $(".cross-link");

 $navthumb
 .click(function() {
  var $this = $(this);
  theInterval($this.parent().attr('href').slice(1) - 1);
  return false;
 });

 theInterval();
});
Couple more things to note. Notice the number “6″ is hardcoded in our function. If you change the number of thumbs, you’ll have to change it here as well. Also, you may have noticed the seemingly strange element that click event is being triggered on (“.stripNav ul li a”… where is that?!). You’ll notice that isn’t anywhere in our HTML. Actually, the Coda Slider plugin automatically generates this unordered list from the number of panels when it runs. Very handy sometimes we we have hidden it in the CSS in our example. We are using them in our function though, as they will be the most reliable elements for the click event. They will exist no matter what, and this example will continue to work and be auto-play regardless if we use the thumbnail navigation or not.
UPDATE: Auto-Play
var $j = jQuery.noConflict();

var theInt = null;
var curclicked = 0;
var stop = 0;

theInterval = function(cur){
       clearInterval(theInt);

       theInt = setInterval(function(){
               $j(".coda-nav-right a").eq(curclicked).trigger('click');
               curclicked++;
               if( 10 == curclicked )
                       curclicked = 0;
               $j("#stop").click(
                       function(){
                               if (stop==0){
                               clearInterval(theInt);
                               stop=1;}
                       });
       }, 750);
       $j("#stop").click(
               function(){
                       stop=0;
                       theInterval();
               }
       );
};
$j(function(){
       $j("#main-photo-slider").prepend('<div id="stop">Start/Stop</div>');
       $j("#main-photo-slider").codaSlider();
       theInterval();
});
You might also like


Tags
accordion accordion menu animation navigation animation navigation menu carousel checkbox inputs css3 css3 menu css3 navigation date picker dialog drag drop drop down menu drop down navigation menu elastic navigation form form validation gallery glide navigation horizontal navigation menu hover effect image gallery image hover image lightbox image scroller image slideshow multi-level navigation menus rating select dependent select list slide image slider menu stylish form table tabs text effect text scroller tooltips tree menu vertical navigation menu