 Subscribe
 Follow Us
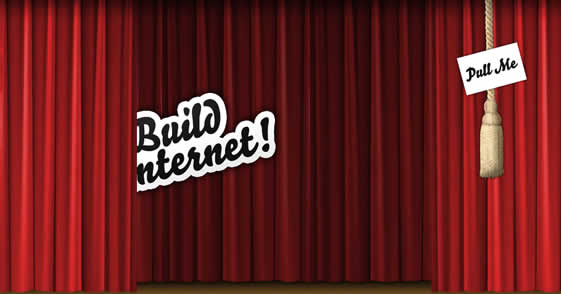
Animate Curtains Opening with jQuery
 13 years ago
  29146
29146  5113
5113
 n/a
n/a
Step 1 – What You’ll Need
This example would not be anything special without the graphics, so let’s make sure you’ve got those under control. I’ve included the ones used in demo as part of the attached files, now would be a good time to download them if you intend to use them.
Secondly, in addition to the standard jQuery file, we are also using the easing plugin. We have worked with this plugin in previous tutorials but in this case we will use it to provide a bounce effect when the rope is pulled.
IE6 Disclaimer – A few of the project images use the PNG format in order to have cleaner transparency. To keep things short, I will not be demonstrating the workaround for transparency errors in IE6. If this affects you, I recommend reading this article for a solution.
Step 2 – Setting Up the HTML
<head>
 <script type="text/javascript" src="<a class="linkification-ext" title="Linkification: http://jqueryjs.googlecode.com/files/jquery-1.3.2.js" href="http://jqueryjs.googlecode.com/files/jquery-1.3.2.js">http://jqueryjs.googlecode.com/files/jquery-1.3.2.js</a>"></script>
 <script src="jquery.easing.1.3.js" type="text/javascript"></script>
</head>
<body>
 <div class="leftcurtain"><img src="images/frontcurtain.jpg"/></div>
 <div class="rightcurtain"><img src="images/frontcurtain.jpg"/></div>
 <img class="logo" src="images/buildinter.png"/>
 <a class="rope" href="#"><img src="images/rope.png"/></a>
</body>
Step 3 – Add the CSS
*{
 margin:0;
 padding:0;
 }
 body {
 text-align: center;
 background: #4f3722 url('images/darkcurtain.jpg') repeat-x;
 }
 img{
 border: none;
 }
 .leftcurtain{
 width: 50%;
 height: 495px;
 top: 0px;
 left: 0px;
 position: absolute;
 z-index: 2;
 }
 .rightcurtain{
 width: 51%;
 height: 495px;
 right: 0px;
 top: 0px;
 position: absolute;
 z-index: 3;
 }
 .rightcurtain img, .leftcurtain img{
 width: 100%;
 height: 100%;
 }
 .logo{
 margin: 0px auto;
 margin-top: 150px;
 }
 .rope{
 position: absolute;
 top: -40px;
 left: 70%;
 z-index: 4;
 }
Let’s pause for a minute and catch up with what we’ve just done.
We made two div classes for the two curtains (.leftcurtain and .rightcurtain) which are locked to their designated sides. This was done in the CSS by using the top,left, and position attributes.
You’ll notice that we specified the width for each curtain, 50% and 51%. The varying widths is to compensate for some choppy edges when the curtains are closed that could cause the elements underneath to peak through. To combat this we made the right curtain slightly overlap the left one, by using the z-indexes. These z-index values also ensure that the curtains stay on top of everything that is supposed to be behind the curtains.
The actual curtain images are set to be 100% width/height of the curtain divs so that when the these divs shrink in width the images become bunched up, just as they would in real life.
The .logo contains what I wish to hide behind the curtain, you can replace it with whatever you wish.
Finally the .rope simply places the rope graphic on top of everything else and hides part of the image off screen so we can accomplish the “pulling the rope” effect later.
Step 4 – Open the Curtains with jQuery
<script type="text/javascript">
 $(document).ready(function() {

 $curtainopen = false;

 $(".rope").click(function(){

 $(this).blur();

 if ($curtainopen == false){

 $(this).stop().animate({top: '0px' }, {queue:false, duration:350, easing:'easeOutBounce'});
 $(".leftcurtain").stop().animate({width:'60px'}, 2000 );
 $(".rightcurtain").stop().animate({width:'60px'},2000 );
 $curtainopen = true;

 }else{

 $(this).stop().animate({top: '-40px' }, {queue:false, duration:350, easing:'easeOutBounce'});
 $(".leftcurtain").stop().animate({width:'50%'}, 2000 );
 $(".rightcurtain").stop().animate({width:'51%'}, 2000 );
 $curtainopen = false;

 }

 return false;

 });

 });
 </script>
When the document is all ready to roll, we establish that the curtains are closed, by setting $curtainopen = false. We use the value of this variable to determine whether to run the animations for opening or closing the curtains via an ‘if’ statement.
The other event that we have mapped out is when .rope is clicked, which causes the above mentioned conditional statement to run. Additionally we blur() the links and return false; to make sure the link does not direct the user elsewhere. For those curious, we have written an article about blurring links, so get versed in it.
If the curtain is currently closed, the .rope is pulled down, repositioned to top:0px from top:-40px, with a bounce effect brought about by the easing plugin we grabbed before. While this magic is happening each curtain is simultaneously adjusted to a width of 60px, which creates the opening effect. You can set the amount of time they take to open by changing the duration, which is currently set to 2000 (or 2 seconds).
Now that the curtains are open, when the rope is pulled again, the conditional statement will run the closing animation which sets everything back to default values.
Step 5 – Cue Excitement, You’re Done
You’ve now got yourself a functioning stage, hopefully you can find something showstopping to put on it. I opted to make the stage stretch the entire screen but you can certainly adjust the width by placing it in a specified width container. This is where the artistic license kicks in. This might also benefit from a preloader to prevent the user from seeing what’s behind the curtain during longer loads.
Tags
accordion accordion menu animation navigation animation navigation menu carousel checkbox inputs css3 css3 menu css3 navigation date picker dialog drag drop drop down menu drop down navigation menu elastic navigation form form validation gallery glide navigation horizontal navigation menu hover effect image gallery image hover image lightbox image scroller image slideshow multi-level navigation menus rating select dependent select list slide image slider menu stylish form table tabs text effect text scroller tooltips tree menu vertical navigation menu