 Subscribe
 Follow Us
JQuery – Star Comment Rating
 13 years ago
 12744
12744 2752
2752

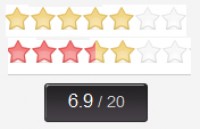
Here is a nice little rating effect. This does not include the PHP, it is only the JavaScript, HTML, CSS, and Images.
What we start with is one HTML file, JQUERY library, star_rating.js (contains all the effects), and the image folder with some images.
Right now I contain all the CSS in the html file, out of shear laziness, and so you don’t have an extra file with a small amount of CSS in it.
So let’s talk about the html.
Everything except the hidden form field that contains the final rating selected is contained within the rating_cont div.
Inside the main rating_cont div is three more divs.
- rating_btns div.
- rating_on div.
- rated div.
<div id="rating_cont"> <div id="rating_btns"></div> <div id="rating_on" > </div> <div id="rated"></div> </div> <input type="hidden" id="rating_output" name="rating_output" value="not rated" />
Now that we have the main divs setup, let’s add some of the style so we can see what we are working with.
We will add the following CSS to the rating_cont, our main div.
#rating_cont { background: #1E1D1C url(images/rating_background.jpg) top left no-repeat; border: 1px solid #F9BA0D; width: 140px; height: 23px; text-align: left; margin-left: 6px;}
This puts the background image of the stars ‘off’ and creates our height, width, border, and background for our main container.
Next, let’s create the CSS and html for the rating_btns div.
The rating_btns div will have an unordered list with the actual ratings in it.
Look below.
<ul>
<li>0.5</li>
<li>1.0</li>
<li>1.5</li>
<li>2.0</li>
<li>2.5</li>
<li>3.0</li>
<li>3.5</li>
<li>4.0</li>
<li>4.5</li>
<li>5.0</li>
</ul>
If you’re doing the code step by step, I’m sure you noticed that this looks pretty ugly right now. Let’s add the CSS to the rating_btns div and the ul we have.
The rating_btns div needs to be above the rating_on div that we will create next, so we will give it a relative positioning and a z-index of 100. We also add the height and width to define the container of our <li> links.
Inside the rating_btns div is our <ul> and it’s <li>. We do not want our <ul> or our <li> to have any margin or padding. The <li> needs to be 14px wide. Guess why. 14 x 100 = 140! Yup, you got it. That is the width of our container, amazing, I know. We are going to float them left, give them a block display so they don’t go over each other, and last but not least, change the font display. We will change the font to 1px, and the same color as the background. I’m sure you’re asking; why not just have them empty and not have any text in there at all? Well, we will use this text to tell our JQuery script what you hovered over.
Here is the CSS for this.
#rating_btns { position: relative; z-index: 100; width: 140px; height: 21px;}
#rating_btns ul, #rating_btns li  { padding: 0; margin: 0; }
#rating_btns li { float: left; width: 14px; height: 21px; display: block; font-size: 1px; cursor: pointer; color: #1E1D1C; }
Next, look at our rating_on div. Just as it says, it is our div that contains our stars that are “ON”. We use a quite unique way of doing this. We give it a background image of the “on” stars, but change it’s width based upon what we hover over. That’s the reason we had to give the rating_btns a relative positioning with a z-index, and this div we will also give a relative positioning, but a z-index of 50. We will also set the width to 0px initially, so it doesn’t show before we hover over it.
Here is the HTML for this:
#rating_on { background: url(images/rating_onbackground.jpg) top left no-repeat; width: 0px; height: 21px; position: relative; z-index: 50; top: -21px; }
<div id="rating_on" > </div>
On to our last div, our rating div, this contains three smaller divs that act as cells, one containing the selected rating, another containing the image of the stars, and the last one containing our edit link.
I still haven’t gotten to the JQuery yet, so I will just show you the CSS, and HTML for this.
#rated { display: none; width: 138px; padding: 3px 0px 3px 2px; height: 23px; background-color: #1E1D1C; height: 17px;font-size: 11px;color: #FFC910;}
#rated div { display: block; float: left; }
#rating { font-size: 11px; font-family: Arial, Helvetica, sans-serif; color: #FFC910; padding-left: 3px; width: 22px; }
#small_stars { height: 11px; width: 69px; background-image: url(images/stars_small_sprite.jpg); background-position: 0px -11px; font-size:1px; line-height: 11px; margin-top:3px; }
#rate_edit { line-height: 17px; font-size: 11px; font-family: Arial, Helvetica, sans-serif; color: #FFF; padding-left: 9px; cursor: pointer; }
#rate_edit:hover { text-decoration: underline; }
<div id="rated"> <div id="rating" style="height: 17px; line-height: 17px;">not rated</div> <div> – </div> <div id="small_stars"> </div> <div id="rate_edit">edit</div> </div>
Since this will be used to send a rating from a form, we will add a hidden form field to be sent. This will be updated from JQuery.
<input type="hidden" id="rating_output" name="rating_output" value="not rated" />
Ok, on to the fun stuff, the JQuery.
This will have a total of six functions, NOT including the document.ready function.
- rateWidth function
- starSprite function
- hover function *JQuery
- mouseout function *JQuery
- click function *JQuery
- edit function *JQuery
With JQuery we need to surround it’s functions with $(document).ready(function()).
In saying that, keep that in mind when you look at the source code. If you don’t know what I am talking about, check out the full source code at the end of this post, or the downloadable source code.
1. rateWidth function
This function accepts the rating variable from our JQuery functions, converts it to an Integer, uses a switch statement to determine the width value, then returns the width to make our rating_on div show the stars. (shows the stars).
function rateWidth($rating){
$rating = parseFloat($rating);
switch ($rating){
case 0.5: $width = "14px"; break;
case 1.0: $width = "28px"; break;
case 1.5: $width = "42px"; break;
case 2.0: $width = "56px"; break;
case 2.5: $width = "70px"; break;
case 3.0: $width = "84px"; break;
case 3.5: $width = "98px"; break;
case 4.0: $width = "112px"; break;
case 4.5: $width = "126px"; break;
case 5.0: $width = "140px"; break;
default:  $width =  "84px";
}
return $width;
}
2. starSprite function
I used two different methods for creating the stars. One uses less HTML, and one uses more. For the small stars that show up when you make a rating, I wanted to use less HTML and used the sprite method to show the rating. But it does the same thing as the rateWidth but determines the background positioning based on the rating provided.
function starSprite($rating){
$rating = parseFloat($rating);
switch ($rating){
case 0.5: $pos = "-11px"; break;
case 1.0: $pos = "-22px"; break;
case 1.5: $pos = "-33px"; break;
case 2.0: $pos = "-44px"; break;
case 2.5: $pos = "-55px"; break;
case 3.0: $pos = "-66px"; break;
case 3.5: $pos = "-77px"; break;
case 4.0: $pos = "-88px"; break;
case 4.5: $pos = "-99px"; break;
case 5.0: $pos = "-110px"; break;
default:  $pos =  "-77px";
}
return $pos;
}
3. hover function *JQuery
The hover function will detect the cursor hovering over our <li>’s and the value of it and then send the value to the rateWidth function to get our width. It then assigns the width to the #rating_on div.
$('#rating_btns li').hover(function(){
$rating = $(this).text();
$('#rating_on').css('width', rateWidth($rating));
});
4. mouseout function
The mouseout function does just that, tells what stars should be showing on mouseout. But we do not want the stars to be reset every time we go off the stars, especially if we already selected a rating. So we grab the value of our #rating div and if it is “not rated” we set our width to 0px but if it doesn’t equal “not rated” we set the width of it’s set value. This way if you have selected a rating it defaults back to it when you mouseout.
$('#rating_btns li').mouseout(function(){
$rating = $('#rating').text();
if($rating == "not rated"){
$('#rating_on').css('width', "0px");
}
else{
$('#rating_on').css('width', rateWidth($rating));
}
});
5. click function
This function has a little bit more going on than the other ones. When you click the <li> it first grabs the value of the clicked <li> assigns it to the #rating div, uses starSprite function to assign the background position for the #small_stars div, then hides the #rating_btns div, and the #rating_on div. Once hidden, it nicely fades in the #rated div.
$('#rating_btns li').click(function(){
$rating = $(this).text();
$('#rating').text($rating);
$('#rating_output').val($rating);
$pos = starSprite($rating);
$('#small_stars').css('background-position', "0px " + $pos );
$('#rating_btns').hide();
$('#rating_on').hide();
$('#rated').fadeIn();
});
6. edit function
This function just hides the #rated div and fades in the two divs we just hid. The #rating_div and the #rating_btns div.
$('#rate_edit').click(function(){
$('#rated').hide();
$('#rating_btns').fadeIn();
$('#rating_on').fadeIn();
});
we’re done.
You might also like
Tags
accordion accordion menu animation navigation animation navigation menu carousel checkbox inputs css3 css3 menu css3 navigation date picker dialog drag drop drop down menu drop down navigation menu elastic navigation form form validation gallery glide navigation horizontal navigation menu hover effect image gallery image hover image lightbox image scroller image slideshow multi-level navigation menus rating select dependent select list slide image slider menu stylish form table tabs text effect text scroller tooltips tree menu vertical navigation menu