 Subscribe
 Follow Us
Beautiful image Filterable Portfolio with jQuery
 14 years ago
  21457
21457  3138
3138
 n/a
n/a
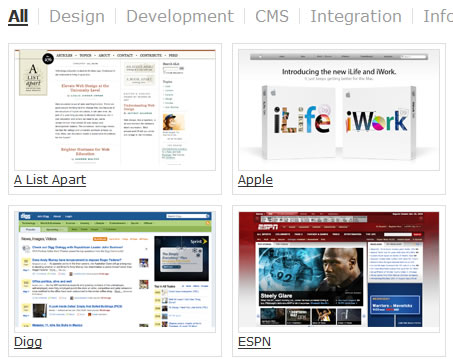
If you have worked in your field for a while, there is a pretty good chance that you have a rather extensive portfolio. To make it a little easier to navigate, you will probably be tempted to break them into different categories. In this we will show you how to make “filtering by category” a little more interesting with just a little bit of jQuery.
1. The Markup
Our portfolio is nothing more than a simple unordered list:
<ul id="portfolio">
 <li><a href="#"><img src="images/a-list-apart.png" alt="" height="115" width="200" />A List Apart</a></li>
 <li><a href="#"><img src="images/apple.png" alt="" height="115" width="200" />Apple</a></li>
 <li><a href="#"><img src="images/cnn.png" alt="" height="115" width="200" />CNN</a></li>
 <li><a href="#"><img src="images/digg.png" alt="" height="115" width="200" />Digg</a></li>
 <li><a href="#"><img src="images/espn.png" alt="" height="115" width="200" />ESPN</a></li>
 <li><a href="#"><img src="images/facebook.png" alt="" height="115" width="200" />Facebook</a></li>
 <li><a href="#"><img src="images/google.png" alt="" height="115" width="200" />Google</a></li>
 <li><a href="#"><img src="images/netflix.png" alt="" height="115" width="200" />Netflix</a></li>
 <li><a href="#"><img src="images/nettuts.png" alt="" height="115" width="200" />NETTUTS</a></li>
 <li><a href="#"><img src="images/twitter.png" alt="" height="115" width="200" />Twitter</a></li>
 <li><a href="#"><img src="images/white-house.png" alt="" height="115" width="200" />White House</a></li>
 <li><a href="#"><img src="images/youtube.png" alt="" height="115" width="200" />YouTube</a></li>
</ul>
2. Categorizing the Portfolio
We are going to assume that our portfolio can be broken down into 5 categories:
- Design
- Development
- CMS
- Integration
- Information Architecture
In order to use the categories we have defined, we will convert them to lowercase and replace all spaces with hyphens:
- Design = design
- Development = development
- CMS = cms
- Integration = integration
- Information Architecture = information-architecture
We are going to assume that each portfolio item could be in one or many categories, so we are going to randomly add our newly created categories as classes to the list items:
<ul id="portfolio">
 <li class="cms integration">
  <a href="#"><img src="images/a-list-apart.png" alt="" height="115" width="200" />A List Apart</a>
 </li>
 <li class="integration design">
  <a href="#"><img src="images/apple.png" alt="" height="115" width="200" />Apple</a>
 </li>
 <li class="design development">
  <a href="#"><img src="images/cnn.png" alt="" height="115" width="200" />CNN</a>
 </li>
 <li class="cms">
  <a href="#"><img src="images/digg.png" alt="" height="115" width="200" />Digg</a>
 </li>
 <li class="design cms integration">
  <a href="#"><img src="images/espn.png" alt="" height="115" width="200" />ESPN</a>
 </li>
 <li class="design integration">
  <a href="#"><img src="images/facebook.png" alt="" height="115" width="200" />Facebook</a>
 </li>
 <li class="cms information-architecture">
  <a href="#"><img src="images/google.png" alt="" height="115" width="200" />Google</a>
 </li>
 <li class="integration development">
  <a href="#"><img src="images/netflix.png" alt="" height="115" width="200" />Netflix</a>
 </li>
 <li class="information-architecture">
  <a href="#"><img src="images/nettuts.png" alt="" height="115" width="200" />NETTUTS</a>
 </li>
 <li class="design information-architecture cms">
  <a href="#"><img src="images/twitter.png" alt="" height="115" width="200" />Twitter</a>
 </li>
 <li class="development">
  <a href="#"><img src="images/white-house.png" alt="" height="115" width="200" />White House</a>
 </li>
 <li class="cms design">
  <a href="#"><img src="images/youtube.png" alt="" height="115" width="200" />YouTube</a>
 </li>
</ul>
Adding Category Navigation
Now that we have the portfolio pieces in place, we are going to need some way to navigate through them. Another unordered list should do:
<ul id="filter">
 <li class="current"><a href="#">All</a></li>
 <li><a href="#">Design</a></li>
 <li><a href="#">Development</a></li>
 <li><a href="#">CMS</a></li>
 <li><a href="#">Integration</a></li>
 <li><a href="#">Information Architecture</a></li>
</ul>
Since I want the default view of the portfolio to show All items, I have assigned a class of current to the first list item.
You will probably look at that and question me on the accessibility of this example. My thought is that you have 3 options to solve that problem.
- When creating a portfolio like this, there is a strong probability that it will be database driven. Thus, you should be able to create a separate page for each category. So if a user does not have JavaScript enabled, they can go to the separate page with the filtered portfolio.
- You can use a similar technique from my last tutorial: setting a parameter in the url.
- You could always just write in the navigation with JavaScript before the portfolio items:
$(document).ready(function() {
 $('ul#portfolio').before('<ul id="filter"><li class="current"><a href="#">All</a></li><li><a href="#">Design</a></li><li><a href="#">Development</a></li><li><a href="#">CMS</a></li><li><a href="#">Integration</a></li><li><a href="#">Information Architecture</a></li></ul>');
});
3. The CSS
This tutorial is not meant to be about CSS, so I’m going to run through the CSS pretty quickly.
I always start with some basic styles as a sort-of framework, so I’m not going to go over those styles right now. These styles basically just act as a reset and define some styling for basic elements.
To start, I just want to display the categories across the top horizontally with a border between each:
ul#filter {
 float: left;
 font-size: 16px;
 list-style: none;
 margin-left: 0;
 width: 100%;
}
ul#filter li {
 border-right: 1px solid #dedede;
 float: left;
 line-height: 16px;
 margin-right: 10px;
 padding-right: 10px;
}
Next, I want to remove the border from the last list item (in browsers that support it) and change the display of the links:
ul#filter li:last-child { border-right: none; margin-right: 0; padding-right: 0; }
ul#filter a { color: #999; text-decoration: none; }
I also want to make sure and differentiate the currently selected category:
ul#filter li.current a, ul#filter a:hover { text-decoration: underline; }
ul#filter li.current a { color: #333; font-weight: bold; }
Ok, now that we have the category navigation styled, let’s focus on the actual layout of the portfolio. Let’s plan on floating 3 list items next to each other with a border around each one:
ul#portfolio {
 float: left;
 list-style: none;
 margin-left: 0;
 width: 672px;
}
ul#portfolio li {
 border: 1px solid #dedede;
 float: left;
 margin: 0 10px 10px 0;
 padding: 5px;
 width: 202px;
}
Now, we just need to add some basic styling for the images and links:
ul#portfolio a { display: block; width: 100%; }
ul#portfolio a:hover { text-decoration: none; }
ul#portfolio img { border: 1px solid #dedede; display: block; padding-bottom: 5px; }
Compensating for Internet Explorer 6
Of course, let’t not forget about our friend IE6. Once you start clicking through some of the filters, the layout gets a little crazy.
From what I can tell, it is the dreaded IE Double Margin bug. I tried applying display: inline to the list items once they are filtered, but that didn’t seem to fix it. So my best solution was to just halve the right margin:
ul#portfolio li { margin-right: 5px; }
We are of course only going to serve this IE6 specific stylesheet using conditional comments:
<!--[if lt IE 7]>
<link href="stylesheets/screen-ie6.css" type="text/css" rel="stylesheet" media="screen,projection" />
<![endif]-->
4. The jQuery
Ok, now that we have the markup and CSS all done, let’t get to the important part of this tutorial: the JavaScript.
We are going to start by including the latest version of jQuery in the head of our document.
<script type="text/javascript" src="scripts/jquery.js"></script>
Next, we want to execute our code once the document is loaded.
$(document).ready(function() {

});
Now, we don’t want to do anything until one of our categories is clicked. We also want to make sure that we do not follow the href value of the link, so we need to return false:
$('ul#filter a').click(function() {
 return false;
});
Once a category link is clicked, I want to do a couple of things: remove the outline on the clicked link, remove the class of current on the list item that has it, and add the class of current on the parent of the clicked link:
$(this).css('outline','none');
$('ul#filter .current').removeClass('current');
$(this).parent().addClass('current');
Next, we want to get the text inside of the clicked link, convert it to lowercase, and replace any spaces with hyphens (just like before when we were creating the category classes):
var filterVal = $(this).text().toLowerCase().replace(' ','-');
The first case of the script is when the All link is clicked. When that is clicked, we want to show all of the portfolio items and remove the class of hidden:
if(filterVal == 'all') {
 $('ul#portfolio li.hidden').fadeIn('slow').removeClass('hidden');
}
Otherwise, one of the actual categories were clicked. So we want to go through each portfolio item and check to see if it has the class that equals the value of the category clicked. If it does not have the class, we want to fade out the list item and add a class of hidden. It it does have the class, we want to fade it in and remove the class of hidden:
else {
 $('ul#portfolio li').each(function() {
  if(!$(this).hasClass(filterVal)) {
   $(this).fadeOut('normal').addClass('hidden');
  } else {
   $(this).fadeIn('slow').removeClass('hidden');
  }
 });
}
You might also like
Tags
accordion accordion menu animation navigation animation navigation menu carousel checkbox inputs css3 css3 menu css3 navigation date picker dialog drag drop drop down menu drop down navigation menu elastic navigation form form validation gallery glide navigation horizontal navigation menu hover effect image gallery image hover image lightbox image scroller image slideshow multi-level navigation menus rating select dependent select list slide image slider menu stylish form table tabs text effect text scroller tooltips tree menu vertical navigation menu