 Subscribe
 Follow Us
AutoSprites - A jQuery Menu Plugin
 14 years ago
  8069
8069  1930
1930
 n/a
n/a

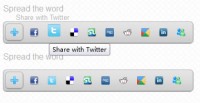
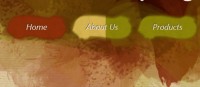
Its purpose is to allow you to build an image-based menu with animated hover states as easily as possible and by using the most concise descriptions possible. To see the results on both a horizontal and vertical menu
Setting up the jQuery Menu Plugin
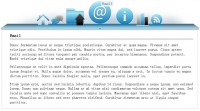
The first component when doing something with sprites is a combined image that contains all menu states. For the menu above, this is the image was used.
The image contains, the normal state, the hover state and the active state. The value to doing things this way is that it allows your site to load faster. Rather than downloading an image for each nav item its hover state and its active state, only a single image needs to be downloaded. This minimizes the overhead of many http requests.
The next thing to do, is set up the HTML for the nav bar:
<ul id="hnav">
 <li id="hnavhome"><a href="#">Home</a></li>
 <li id="hnavlocal"><a href="#">Local Industry</a></li>
 <li id="hnavhigher"><a href="#">Higher Education</a></li>
 <li id="hnavcomm"><a href="#">Our Community</a></li>
 <li id="hnavnews"><a href="#">News</a></li>
</ul>
Then we need to set up the CSS. There are a couple of things to note here. We are applying the background image to the containing element so that we don't need to respecify background positioning. This also makes the menu usable if javascript is disabled. Each element needs to have its size defined specifically as well.
#hnav { position: absolute; top: 0; left: 0; width: 615px; height: 72px; background: url('horiz_sprites.gif') no-repeat; }
#hnav li { position: absolute; left: 0; height: 72px; }
 #hnav #hnavhome { width: 82px; left: 0px; }
 #hnav #hnavlocal { width: 146px; left: 82px; }
 #hnav #hnavhigher{ width: 162px; left: 228px; }
 #hnav #hnavcomm { width: 143px; left: 390px; }
 #hnav #hnavnews { width: 82px; left: 533px; }
#hnav li a { display: block; position: absolute; top: 0; left: 0; width: 100%; height: 72px; text-indent: -9999em; }
Notice how much less complicated the CSS is than what is typical with sprites. There is no need to define background positioning for each element and its hover state. The last piece you'll need to do is enable the autosprites plugin:
$(document).ready(function(){
 $('#hnav').autosprites();
});
There are no required options. The plugin defaults to a horizontal menu and fading for the animation. It infers everything else from the CSS. If you would like to customize things, here are the options that are available:
settings = $.extend({
 offset: '100%',
 orientation: 'horizontal',
 over: { opacity: 'show' },
 overSpeed: 500,
 out: { opacity: 'hide' },
 outSpeed: 500,
 activeState: false,
 activeClass: 'active',
 activeSprites: false
}, settings);
The only bit worth explaining is the active state. In the image above, I show three states. By default, you only need two, a normal state and a hover state. If you set 'activeState' to true, it will use the hover state by default. If you want to specify your own active state, simply set 'activeSprites' to true as well.
You might also like

Tags
accordion accordion menu animation navigation animation navigation menu carousel checkbox inputs css3 css3 menu css3 navigation date picker dialog drag drop drop down menu drop down navigation menu elastic navigation form form validation gallery glide navigation horizontal navigation menu hover effect image gallery image hover image lightbox image scroller image slideshow multi-level navigation menus rating select dependent select list slide image slider menu stylish form table tabs text effect text scroller tooltips tree menu vertical navigation menu