 Subscribe
 Follow Us
Content Slider using jFlow, A Minimalist jQuery Plugin
 13 years ago
  15176
15176  2294
2294
 n/a
n/a
So, let’s start to create our content-slider now.
Create a style.css file, and insert the following code into the file:
#jFlowSlide{ background:#DBF3FD; font-family: Georgia; }
#myController { font-family: Georgia; padding:2px 0;  width:610px; background:#3AB7FF; }
#myController span.jFlowSelected { background:#43A0D5;margin-right:0px; }

.slide-wrapper { padding: 5px; }
.slide-thumbnail { width:300px; float:left; }
.slide-thumbnail img {max-width:300px; }
.slide-details { width:290px; float:right; margin-left:10px;}
.slide-details h2 { font-size:1.5em; font-style: italic; font-weight:normal; line-height: 1; margin:0; }
.slide-details .description { margin-top:10px; }

.jFlowControl, .jFlowPrev, .jFlowNext { color:#FFF; cursor:pointer; padding-left:5px; padding-right:5px; padding-top:2px; padding-bottom:2px; }
.jFlowControl:hover, .jFlowPrev:hover, .jFlowNext:hover { background: #43A0D5; }
Open your main document and include the style.css, jQuery, and jFlow in the <head> tag.
<link rel="stylesheet" href="style.css" type="text/css" media="screen" />
<script language="javascript" type="text/javascript" src="jquery-1.3.2.min.js"></script>
<script language="javascript" type="text/javascript" src="jquery.flow.1.2.js"></script>
Then add this simple JavaScript code to define the settings for jFlow
<script type="text/javascript">
$(document).ready(function(){
    $("#myController").jFlow({
        slides: "#slides",  // the div where all your sliding divs are nested in
        controller: ".jFlowControl", // must be class, use . sign
        slideWrapper : "#jFlowSlide", // must be id, use # sign
        selectedWrapper: "jFlowSelected",  // just pure text, no sign
        width: "610px",  // this is the width for the content-slider
        height: "235px",  // this is the height for the content-slider
        duration: 400,  // time in miliseconds to transition one slide
        prev: ".jFlowPrev", // must be class, use . sign
        next: ".jFlowNext" // must be class, use . sign
    });
});
</script>
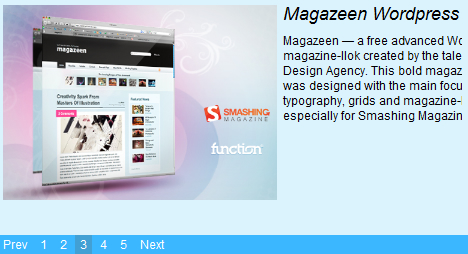
Think #slides as a container, which contain all slides, while .jFlowControl is the controller which let us go to the individual slide. As you can see from the style.css, we have 300px .slide-thumbnail to display our image, 290px .slide-details to display our title and description. Besides these, we have 10px margin-left for the .slide-description and 5px padding for the .slide-wrapper. So totally we need 610px width. For the “height” setting, you need to estimate the maximum height for your content. Here, i will use 235px as an example.
Now is the turn to create the individual slide. The slide is contained in the #slides div. Here, i will conly show one slide. You may refer the source code for more info.
<div class="slide-wrapper">
    <div class="slide-thumbnail">
        <!-- image here -->
    </div>
    <div class="slide-details">
        <h2><!-- title here --></h2>
        <div class="description">
            <!-- description here. -->
        </div>
    </div>
    <div class="clear"></div>
</div>
We will wrap everything in a .slide-wrapper class, and float our thumbnail to the left while our content to the right. Don’t forget to clear the floats also. Replace image, title, and description with your own content.
After that, we may add controls to the slides, which are resides in a #myController div.
<span class="jFlowPrev">Prev</span>
<span class="jFlowControl">1</span>
<span class="jFlowNext">Next</span>
The .jFlowPrev and .jFlowNext are necessary controls to go to previous and next slides, while .jFlowControl is a “button” to jump to any particular slide. The number of .jFlowControl span is depends on the number of slides you have.That’s all!!
You might also like


Tags
accordion accordion menu animation navigation animation navigation menu carousel checkbox inputs css3 css3 menu css3 navigation date picker dialog drag drop drop down menu drop down navigation menu elastic navigation form form validation gallery glide navigation horizontal navigation menu hover effect image gallery image hover image lightbox image scroller image slideshow multi-level navigation menus rating select dependent select list slide image slider menu stylish form table tabs text effect text scroller tooltips tree menu vertical navigation menu