 Subscribe
 Follow Us
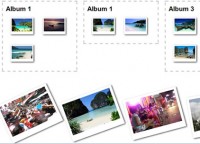
Threadless Style T-Shirt Gallery jQuery
 13 years ago
  9773
9773  1793
1793
 n/a
n/a
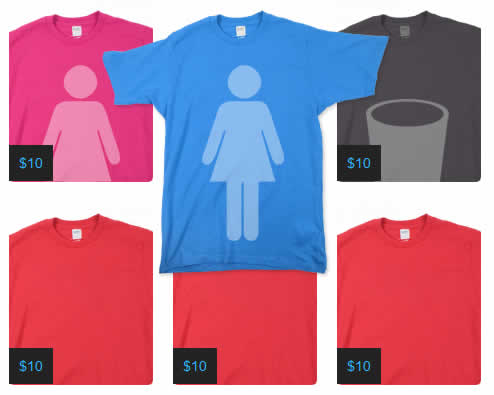
The Basic Idea
Here’s the gist: There’s a thumbnail which is a full sized image in a container div, which is smaller than the full sized image. The image is centered within it, but doesn’t show entirely because overflow:hidden is turned on. When the mouse hovers over the thumbnail, overflow:hidden gets turned off, and the entire image is displayed.
The caption and overlay are positioned on top of the thumbnail/image while all this is going on, disappearing when the full image is displayed from the mouse hovering on top of it.
Customizing It
Not everyone is looking to only display t-shirts with this method, it works equally well with standard images too. The overlay image should be the same size as your thumbnail – it serves to define the size of the link. You can use the overlay to create some neat effects, I did rounded corners, but you could do things like gradients or different corners. I’ve included the code required below, but really, you should probably just download the attached files as it’s easier to tweak from there.
The CSS
*{
 margin:0;
 padding:0;
 }
 img{
 border: none;
 }
 body {
 text-align: center;
 background: #222;
 }
 h2{
 color: #333;
 font:italic 36px Georgia, serif;
 padding: 20px;
 border-bottom: dashed 1px #999;
 clear: both;
 }
 #content{
 width: 100%;
 margin: 0px auto;
 background: #fff;
 text-align: center;
 margin-bottom: 50px;
 }
 .row{ /*Container for each row of shirts*/
 width: 495px;
 margin: 0px auto;
 clear:both;
 padding: 20px 0;
 }
 .teebox{
 overflow: hidden; /*Prevents excess of image from showing*/
 position: relative;
 margin: 0 10px;
 width: 144px; /*Width and height define thumbnail size*/
 height: 183px;
 float: left;
 clear: right;
 z-index: 0;
 }
 .selected{
 overflow: visible; /*Display part of image that not currently visible*/
 z-index: 10;
 }

 .teebox img {
 left:-84px; /*Use this to center your image when not hovered*/
 position: absolute;
 }
 .teebox a{ /*Area that changes to selected class when hovered over*/
 display:block;
 position: relative;
 float: left;
 left: 84px; /*Use to line up the overlay image*/
 z-index: 1;
 }
 .caption{
 color: #2FB5FF;
 font:14px Arial;
 position: relative;
 float: left;
 left: 0px;
 top: 146px;
 padding: 10px;
 background: #222;
 z-index: 1;
 }
The HTML
This is the HTML for a single shirt, but you could repeat the rows and shirt containers (.teebox) as needed.
<div id="content">
 <div class="row">
    <div class="teebox">
       <a href="#"><img src="overlay.png"/></a><img src="pinktee.png"/>
       <div class="caption">$10</div>
    </div>
 </div>
</div>
The jQuery
$(document).ready(function() {
 $(".teebox a").mouseover(function(){
    $(this).parent().addClass("selected");
    $(this).find('img').animate({opacity: "0.0"}, 0); //Hides overlay
    $(this).parent().find('.caption').hide(); //Hides Caption
 }).mouseout(function(){
    $(this).parent().removeClass("selected");
    $(this).find('img').animate({opacity: "1.0"}, 0); //Shows overlay
    $(this).parent().find('.caption').show(); //Shows Caption
 });
});
You might also like
Tags
accordion accordion menu animation navigation animation navigation menu carousel checkbox inputs css3 css3 menu css3 navigation date picker dialog drag drop drop down menu drop down navigation menu elastic navigation form form validation gallery glide navigation horizontal navigation menu hover effect image gallery image hover image lightbox image scroller image slideshow multi-level navigation menus rating select dependent select list slide image slider menu stylish form table tabs text effect text scroller tooltips tree menu vertical navigation menu