 Subscribe
 Follow Us
jQuery Flipping Content Tabs
 13 years ago
 17170
17170 3445
3445
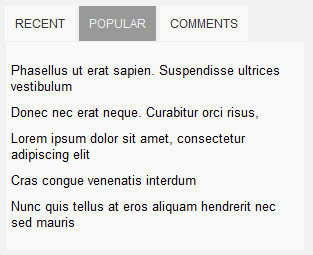
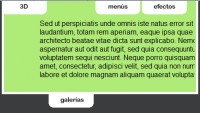
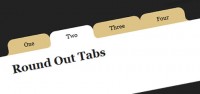
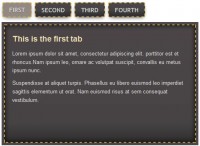
Content Tabs have become more popular lately with more and more websites and blogs using them to show more content in lesser space. Today I am going to show you how to create content tabs with nice flipping effect.
The HTML Structure
Here’s the HTML structure you’ll need to use:
<div id="flip-tabs" >
 <ul id="flip-navigation" >
  <li class="selected"><a href="#" id="tab-0"  >Recent</a></li>
  <li><a href="#" id="tab-1" >Popular</a></li>
  <li><a href="#" id="tab-2" >Comments</a></li>
 </ul>
 <div id="flip-container" >
  <div>
   <!--Put Content for first tab here-->
  </div>
  <div>
   <!--Put Content for second tab here-->
  </div>
  <div>
   <!--Put Content for third tab here-->
  </div>
 </div>
</div>
You can add as many tabs as you like just add more div tags inside the flip-container div and to make them accessible, do add entries in the flip-navigation list to make navigation tab for new div’s. The id field of a tag in the flip-navigation list items is important.
The id’s are of type tab-x where x is the index of the content div in the flip-container. The index starts from zero, so if you add a new div below the third content div, then the id of the navigation link corresponding to it will be tab-3.
Another thing to keep in mind is the selected CSS class, that is added to the navigation item corresponding to currently open content tab.
The CSS Styles
Here are a few styles i applied to the above HTML structure. These can be customized to whatever you want.
#flip-tabs{
 width:300px;
 margin:20px auto; position:relative;
}
#flip-navigation{
 margin:0 0 10px; padding:0;
 list-style:none;
}
#flip-navigation li{
 display:inline;
}
#flip-navigation li a{
 text-decoration:none; padding:10px;
 margin-right:0px;
 background:#f9f9f9;
 color:#333; outline:none;
 font-family:Arial; font-size:12px; text-transform:uppercase;
}
#flip-navigation li a:hover{
 background:#999;
 color:#f0f0f0;
}
#flip-navigation li.selected a{
 background:#999;
 color:#f0f0f0;
}
#flip-container{
 width:300px;
 font-family:Arial; font-size:13px;
}
#flip-container div{
 background:#fff;
}
The JavaScript Code
Finally, the javascript code that will make your flipping content tabs work:
$('document').ready(function(){
 //initialize quickflip
 $('#flip-container').quickFlip();

 $('#flip-navigation li a').each(function(){
  $(this).click(function(){
   $('#flip-navigation li').each(function(){
    $(this).removeClass('selected');
   });
   $(this).parent().addClass('selected');
   //extract index of tab from id of the navigation item
   var flipid=$(this).attr('id').substr(4);
   //Flip to that content tab
   $('#flip-container').quickFlipper({ }, flipid, 1);

   return false;
  });
 });
});
Code Explanation: On document ready, we initialize the quickflip plugin as on Line 3 by calling it for flip-container div. One thing to keep in mind is that if you change the id of flip-container div, remember to change it in JavaScript too.
After that the click event of navigation list is controlled and on click, the clicked item is added the selected CSS class and we call the quickFlipper() function to flip to the selected content tab.
quickFlipper() function allows you to control the speed of flipping by providing options in the first parameter. e.g.
quickflipper({ openSpeed:200, closeSpeed:250 }, flipid, 1);
Also, do not change the value third parameter which is the number of times the flip event occurs.
You might also like

Tags
accordion accordion menu animation navigation animation navigation menu carousel checkbox inputs css3 css3 menu css3 navigation date picker dialog drag drop drop down menu drop down navigation menu elastic navigation form form validation gallery glide navigation horizontal navigation menu hover effect image gallery image hover image lightbox image scroller image slideshow multi-level navigation menus rating select dependent select list slide image slider menu stylish form table tabs text effect text scroller tooltips tree menu vertical navigation menu