 Subscribe
 Follow Us
a Fade Slideshow jQuery
 13 years ago
 23235
23235 4563
4563

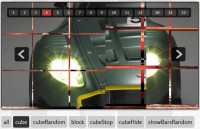
In order to more easily access each slide from JavaScript, each slide is numbered in its id name. Then the copy is placed in a new <div> container, so that the position of the copy is easier to control.
Finally, at the bottom, you create markup for the buttons that allow control over the slideshow, so that when you press button "1", for example, the slideshow stops, and slide "1" is displayed.
To see how it fits together a little better, let's apply a little CSS.
body {
    font-family: Arial, sans-serif;
}
div#tmpSlideshow {
    margin: 10px;
    padding: 30px 0 0 0;
    position: relative;
    height: 335px;
    width: 755px;
    border: 1px solid rgb(200, 200, 200);
}
div.tmpSlide {
    position: absolute;
    top: 0;
    left: 0;
    width: 730px;
    height: 332px;
    display: none;
}
div.tmpSlide img {
    float: left;
    margin: 30px 0 0 15px;
    width: 527px;
    border: 1px solid rgb(244, 244, 244);
}
div#tmpSlideshowControls {
    position: absolute;
    bottom: 30px;
    right: 11px;
    width: 175px;
}
div.tmpSlideshowControl {
    border: 1px solid #e1dece;
    float: left;
    margin: 0 5px 0 0;
    background: url('Feature.png') no-repeat;
    width: 38px;
    height: 36px;
    color: #554d31;
    font: 14px Arial, sans-serif;
    text-align: center;
    cursor: pointer;
}
div.tmpSlideshowControl span {
    line-height: 36px;
    vertical-align: middle;
}
div.tmpSlideshowControlOn {
    background-image: url('FeatureOver.png');
}
div.tmpSlideshowControlActive {
    border: 1px solid rgb(161, 155, 137);
}
div.tmpSlideCopy {
    position: absolute;
    left: 565px;
    top: 20px;
    width: 170px;
}
div#tmpSlideshow h4 {
    color: #b90f23;
    text-transform: uppercase;
    font: 14px Arial, sans-serif;
    margin: 10px 0;
}
div.tmpSlideCopy p {
    font: 11px Arial, sans-serif;
    line-height: 1.75em;
}
In the preceding CSS, each slide is positioned absolutely, relative to the <div> with id name tmpSlideshow, just as I promised they would be. Then, within each slide, each image is floated left, and the copy is positioned absolutely to the right side. The controls are positioned to the bottom of the container. All-in-all a very painless and straight-forward stylesheet.
To get ready for jQuery, you add a few styles that will be applied dynamically. A style for when the controls are moused over by the user, and a style to indicate which slide is active, by drawing a dark border around the control that goes with the currently active slide.
The rule with the selector div.tmpSlideshowControlOn is applied when the user mouses over a slideshow control. And the rule with the selector div.tmpSlideshowControlActive is applied to indicate which slide the user is currently seeing by drawing that dark border around the relevant control.
Now that you have markup and CSS, the final step is to apply JavaScript and jQuery, the following code makes the slideshow function.
body {
    font-family: Arial, sans-serif;
}
div#tmpSlideshow {
    margin: 10px;
    padding: 30px 0 0 0;
    position: relative;
    height: 335px;
    width: 755px;
    border: 1px solid rgb(200, 200, 200);
}
div.tmpSlide {
    position: absolute;
    top: 0;
    left: 0;
    width: 730px;
    height: 332px;
    display: none;
}
div.tmpSlide img {
    float: left;
    margin: 30px 0 0 15px;
    width: 527px;
    border: 1px solid rgb(244, 244, 244);
}
div#tmpSlideshowControls {
    position: absolute;
    bottom: 30px;
    right: 11px;
    width: 175px;
}
div.tmpSlideshowControl {
    border: 1px solid #e1dece;
    float: left;
    margin: 0 5px 0 0;
    background: url('Feature.png') no-repeat;
    width: 38px;
    height: 36px;
    color: #554d31;
    font: 14px Arial, sans-serif;
    text-align: center;
    cursor: pointer;
}
div.tmpSlideshowControl span {
    line-height: 36px;
    vertical-align: middle;
}
div.tmpSlideshowControlOn {
    background-image: url('FeatureOver.png');
}
div.tmpSlideshowControlActive {
    border: 1px solid rgb(161, 155, 137);
}
div.tmpSlideCopy {
    position: absolute;
    left: 565px;
    top: 20px;
    width: 170px;
}
div#tmpSlideshow h4 {
    color: #b90f23;
    text-transform: uppercase;
    font: 14px Arial, sans-serif;
    margin: 10px 0;
}
div.tmpSlideCopy p {
    font: 11px Arial, sans-serif;
    line-height: 1.75em;
}
The JavaScript is written as a jQuery plugin, actually two plugins. SplitID() and Slideshow.
SplitID() is very simple, you call it on a DOM markup element, it takes that element's id name, splits it on the hyphen and returns whatever characters appear after the last hyphen.
SplitID : function()
{
  return this.attr('id').split('-').pop();
}
For example, if you have the id name tmpSlide-3, SplitID() returns "3".
The second plugin, Slideshow is an object, with sub functions, this object contains all the functionality associated with the slideshow itself.
The first method that you see inside of the Slideshow object is the Ready() method.
Ready : function()
{
  $('div.tmpSlideshowControl')
    .hover(
      function() {
        $(this).addClass('tmpSlideshowControlOn');
      },
      function() {
        $(this).removeClass('tmpSlideshowControlOn');
      }
    )
    .click(
      function() {
        $$.Slideshow.Interrupted = true;

        $('div.tmpSlide').hide();
        $('div.tmpSlideshowControl').removeClass('tmpSlideshowControlActive');

        $('div#tmpSlide-' + $(this).SplitID()).show()
        $(this).addClass('tmpSlideshowControlActive');

        $$.Slideshow.Counter = parseInt($(this).SplitID());
        setTimeout('$$.Slideshow.Resume();', 5000); // Resume after 5 seconds
      }
    );

  this.Counter = 1;
  this.Interupted = false;

  this.Transition();
}
The Ready() method sets everything up for you, and it's called once the DOM has finished loading, via jQuery's ready() event.
$(document).ready(
  function() {
    $$.Slideshow.Ready();
  }
);
Going back to $$.Slideshow.Ready(), the function attaches events to the slideshow controls, using a jQuery selector, $('div.tmpSlideshowControl'), which applies jQuery hover() and click() events to each <div> with class name tmpSlideshowControl. The hover() event just adds the class name tmpSlideshowControlOn to each of those <div>/span> elements when the user mouses over a control, and removes that class name when the user's mouse leaves a control. The first callback function in the hover() event is executed at the JavaScript onmouseover event, and the second callback function is executed at the JavaScript onmouseout event.
.hover(
  function() {
    $(this).addClass('tmpSlideshowControlOn');
  },
  function() {
    $(this).removeClass('tmpSlideshowControlOn');
  }
)
One of the great things about jQuery is the ability to chain multiple method calls to a selection. In this example, after you've applied jQuery's hover() event, you can continue adding more events or performing operations on the selection by chaining calls to other jQuery methods. In this case, you chain a call to jQuery's click() method, which adds a JavaScript onclick event to each <div> element with class name tmpSlideshowControl.
.click(
  function() {
    $$.Slideshow.Interupted = true;

    $('div.tmpSlide').hide();
    $('div.tmpSlideshowControl').removeClass('tmpSlideshowControlActive');

    $('div#tmpSlide-' + $(this).SplitID()).show()
    $(this).addClass('tmpSlideshowControlActive');

    $$.Slideshow.Counter = parseInt($(this).SplitID());
    setTimeout('$$.Slideshow.Resume();', 5000); // Resume after 5 seconds
  }
);
In the preceding call to jQuery's click() method, you attach a callback function that executes whenever a user clicks on one of the <div> elements acting as a slideshow control. Inside of that callback function, you flag that slideshow as interrupted by setting the variable $$.Slideshow.Interrupted to true. Setting this variable to true is used later in the program to stop the automated slide transition. Next all slides are hidden using $('div.tmpSlide').hide();. And the class name tmpSlideshowControlActive is removed from all slide controls. This gives you a blank slate to work with, at this point, no slides are displayed, and no slides are set active. Next you display the slide corresponding to the control the user clicked on with this code: $('div#tmpSlide-' + $(this).SplitID()).show(). Using this code, you select the slide by calling its id name. SplitID() gets the right slide, so if you click on the control with id name tmpSlideshowControl-1, the slide with id name tmpSlide-1 is displayed. Then, finally, the control corresponding to the slide being displayed is given the class name tmpSlideshowControlActive, giving the user a visual indication of which slide they are currently viewing.
The remainder of the $$.Slideshow.Ready() function sets up your slide show.
this.Counter = 1;
this.Interrupted = false;

this.Transition();
The Counter variable sets which slide will be displayed first, and subsequently is used to keep track of which slide the user is currently seeing. Then again, the Interrupted variable is used to stop the slide show if the user clicks on a control. Finally, the automated transition is started with a call to this.Transition();
The body of the Transition() function is displayed below:
Transition : function()
{
  if (this.Interrupted) {
    return;
  }

  this.Last = this.Counter - 1;

  if (this.Last < 1) {
    this.Last = 3;
  }

  $('div#tmpSlide-' + this.Last).fadeOut(
    'slow',
    function() {
      $('div#tmpSlideshowControl-' + $$.Slideshow.Last).removeClass('tmpSlideshowControlActive');
      $('div#tmpSlideshowControl-' + $$.Slideshow.Counter).addClass('tmpSlideshowControlActive');
      $('div#tmpSlide-' + $$.Slideshow.Counter).fadeIn('slow');

      $$.Slideshow.Counter++;

      if ($$.Slideshow.Counter > 3) {
        $$.Slideshow.Counter = 1;
      }

      setTimeout('$$.Slideshow.Transition();', 5000);
    }
  );
}
The function begins by checking the value of the Interrupted variable, if it is true, the function returns, which effectively stops the automated transition between slides, so that when a user clicks on a button, they see only that slide
if (this.Interrupted) {
  return;
}
Next, you need to determine what slide was the last slide to be displayed, to do this, you subtract "1" from the variable Counter, which is used to keep track of which slide is currently on display. If the value of Last is less than "1", then the value is reset to "3", which ensures that the value of Last is always "1", "2", or "3", corresponding to a numbered slide.
Next, you transition the slide currently on display using jQuery's fadeOut() method.
$('div#tmpSlide-' + this.Last).fadeOut(
    'slow',
    function() {
    }
);
You use the variable Last to select the right slide by its id name, then jQuery's fadeOut() method does all the work. Passing the argument "slow" causes jQuery's fadeOut() to use a defined length of time, which may or may not line up with your idea of "slow", if not, you can also specify the amount of time you want the transition to take in milliseconds. Then, of course, the fadeOut() method animates the element's opacity, providing a smooth transition between fully opaque and fully transparent.
The 2nd argument passed to jQuery's fadeOut() method is a callback function that is executed once the animation of the element's opacity completes.
After the element has been hidden, you remove the class tmpSlideshowControlActive from the corresponding control, and add the same class to the next slide, then fade in the new slide. Then finally, the counter is incremented. If the counter is greater than "3", the counter is reset to "1".
The last order of business is to call JavaScript's setTimeout() method. The first argument provides a call to the Transition() method in a string, the second argument provides the amount of time in milliseconds to wait before calling the method again. 5000, corresponds to "5" seconds.
function() {
  $('div#tmpSlideshowControl-' + $$.Slideshow.Last).removeClass('tmpSlideshowControlActive');
  $('div#tmpSlideshowControl-' + $$.Slideshow.Counter).addClass('tmpSlideshowControlActive');
  $('div#tmpSlide-' + $$.Slideshow.Counter).fadeIn('slow');

  $$.Slideshow.Counter++;

  if ($$.Slideshow.Counter > 3) {
    $$.Slideshow.Counter = 1;
  }

  setTimeout('$$.Slideshow.Transition();', 5000);
}
You might also like


Tags
accordion accordion menu animation navigation animation navigation menu carousel checkbox inputs css3 css3 menu css3 navigation date picker dialog drag drop drop down menu drop down navigation menu elastic navigation form form validation gallery glide navigation horizontal navigation menu hover effect image gallery image hover image lightbox image scroller image slideshow multi-level navigation menus rating select dependent select list slide image slider menu stylish form table tabs text effect text scroller tooltips tree menu vertical navigation menu