 Subscribe
 Follow Us
Elastic Textarea form with jQuery (Ext JS)
 13 years ago
 11831
11831 1964
1964
Since it was first featured on Facebook, elastic textareas – <textarea> elements that automatically expand or shrink depending on how much text the user inputs – has become one of the coolest functional UI effects on the web. In this article, I will guide you through the re-creation of this astonishing effect using Ext JS, and I bet you that you will be surprised to see how easy it is to do it.
Step 1: Laying down the foundations
First step is to create a function and set up some control variables; we shall name this function elasticTextArea.
We also declare two extra functions that allow us to get and set all CSS styles at once.
function elasticTextArea (elementId){
/*
 * This are two helper functions, they are declared here for convenience
 * so we can get and set all styles at once and because they are not
 * available in ext-core only in Ext JS
 */
 //available in Ext JS (not ext-core) as element.getStyles
 function getStyles(el, arguments){
  var ret = {};
  total = arguments.length;
  for (var n=0; n< len;) {
   el.setStyle(styles[i++], styles[i++]);
    }
     } else if (Ext.isObject(styles)) {
     el.setStyle(styles);
   }
  }
 }
 //minimum and maximum textarea size
 var minHeight = 10;
 var maxHeight = 300;
 //increment value when resizing the textarea
 var growBy = 20 ;
 var el = Ext.get(elementId);
Step 2: Get the textarea CSS styles
To get an accurate measurement, we need to get the textarea CSS styles that affect text formatting, and they are:
paddingfont-size(and other font styles)font-familyline-heightwidth
//get textarea width
 var width = el.getWidth();
//current textarea styles
 var styles = el.getStyles('padding-top', 'padding-bottom', 'padding-left',
              'padding-right', 'line-height', 'font-size',
              'font-family', 'font-weight', 'font-style');
//store textarea width into styles object to later apply them to the div
styles.width = width +'px';

//hide the textarea scrool to avoid flickering
el.setStyle('overflow', 'hidden');
Step 3: Create the hidden div
And here’s where the magic begins. We start by creating a hidden container for the textarea contents.
We set its position to absolute — this way, the div is removed from the layout’s flow and positioned outside the visible area of the browser.
Note: setting its visibility CSS attribute to hidden or its display to none causes some browsers not to recalculate its height, that’s why we opted for this method.
We also instruct the textarea to recalculate its height by re-running this function on every key stoke; another method is to run it at a specific interval, but I find it to be more resource-intensive and less elegant that way.
 //create the hidden div only if does not exists
 if(!this.div){
  //create the hidden div outside the viewport area
  this.div = Ext.DomHelper.append(Ext.getBody() || document.body, {
   'id':elementId + '-preview-div',
   'tag' : 'div',
   'style' : 'position: absolute; top: -100000px; left: -100000px;'
  }, true);
 //apply the textarea styles to the hidden div
 Ext.DomHelper.applyStyles(this.div, styles);
 //recalculate the div height on each key stroke
 el.on('keyup', function(){
  elasticTextArea(elementId);
 }, this);
}
Step 4: Copy textarea contents to the hidden div and get its height
To ensure a correct measurement, we replace some special characters with their HTML character entities and also append a space (' ') string to the new line to force its representation.
/* clean up textarea contents, so that no special chars are processed
 * replace \n with so that the enter key can trigger a height increase
 * but first remove all previous entries, so that the height measurement
 * can be as accurate as possible
 */
 this.div.update(
  el.dom.value.replace(//, '')
  .replace(/<|>/g, ' ')
  .replace(/&/g,"&")
  .replace(/\n/g, '')
 );
 //finally get the div height
 var textHeight = this.div.getHeight();
Step 5: Resize the textarea
In the last step, we give the textarea its new height.
//enforce textarea maximum and minimum size
  if ( (textHeight > maxHeight ) && (maxHeight > 0) ){
   textHeight = maxHeight;
   el.setStyle('overflow', 'auto');
  }
  if ( (textHeight < minHeight ) && (minHeight > 0) ){
   textHeight = minHeight ;
  }
 //resize the textarea
 el.setHeight(textHeight + growBy , true);
}
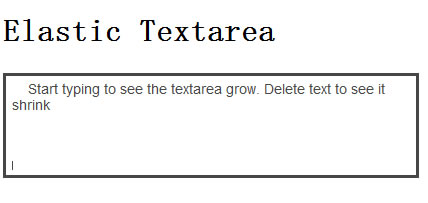
Try it out
Wasn’t that simple? Save the JavaScript code we wrote as elasticTextarea.js or download the source, include Ext Core and the JavaScript library, and have fun.
To include the JS libraries:
<script type="text/JavaScript" src="ext-core/ext-core.js"></script>
<script type="text/JavaScript" src="elastic.js"></script>
The HTML for the text area:
<textarea id="ta"></textarea>
To call the function (’ta’ being the ID of the textarea):
<script type="text/JavaScript">
 elasticTextArea("ta");
</script>
Conclusion
The purpose of this article is to introduce you to Ext JS. If you know your JavaScript well, you might find that this code will only work for one textarea.
You might also like


Tags
accordion accordion menu animation navigation animation navigation menu carousel checkbox inputs css3 css3 menu css3 navigation date picker dialog drag drop drop down menu drop down navigation menu elastic navigation form form validation gallery glide navigation horizontal navigation menu hover effect image gallery image hover image lightbox image scroller image slideshow multi-level navigation menus rating select dependent select list slide image slider menu stylish form table tabs text effect text scroller tooltips tree menu vertical navigation menu