 Subscribe
 Follow Us
Simple Contained float Sticky Scroll jQuery Plugin
 13 years ago
 10480
10480 2052
2052
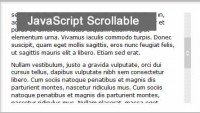
This is achieved using a custom coded jQuery plugin that I created for this exact purpose. I’ve dubbed it the Contained Sticky Scroll plugin, and released it as a freebie.
Anyhow, I thought it might also be interesting to take a deeper look at the code and the process that I used to write the plugin, so that’s what this post will be about.
As with any coding project, the first step is to determine the basic objectives of what we’re looking to accomplish. In this case, my main objectives were:
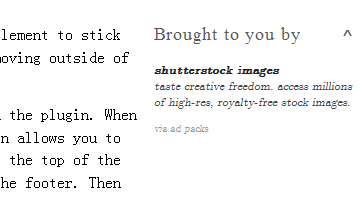
- To have a sidebar that would hug or “stick” to the top of the screen as a reader scrolls down the page, thus prolonging the visibility of the ads on the blog.
- Scrolling shouldn’t start until the top of the sidebar drifts above the top of the window.
- Scrolling should stop once the scrolling reaches the bottom the main content area, so that the sidebar does not hover down over the comment and footer areas, since this would look horrible in the context of the site’s overall design.
- There needs to be a way to unstick the sidebar, for users who may not like the stickiness
From the outset, it was abundantly clear to me that jQuery was going to be the best solution. It’s the one JavaScript framework with which I am the most familiar, and I’ve been working with it extensively over the past several months in some unrelated development work. It also has a robust library of animation based functionality, and methods for retrieving positioning information that will be vital for what I was trying to accomplish.
As such, to start, we’ll want to basically define the basic structure for our plugin:
(function( $ ){

  $.fn.containedStickyScroll = function( options ) {

  /* Code will go here */

  };
})( jQuery );
This code basically initiates a new method and attaches it to the universal jQuery object. Now we can utilize this method, called containedStickyScroll by calling the basic jQuery object. The method will also accept a collection of options, which should be passed as a basic JSON object (just like any other jQuery plugin).
For any plugin that uses options, we also need to set default values to be used in the event that an option is not specified by the user. In practice, it is very common for plugin methods to be called with only a few of the available options. Often, no options are supplied at all! So, it’s very important to declare defaults for values that will be needed as the plugin executes.
To set our defaults, we just need to create a simple object like this:
var defaults = {
   unstick : true,
   easing: 'linear',
   duration: 500,
   queue: false,
   closeChar: '^',
   closeTop: 0,
   closeRight: 0
}
Let’s walk through these options quickly. First the unstick option basically tells the plugin whether or not the unstick functionality should be activated. We have defaulted this option to true.
Next, we have easing, duration and queue, all of which are options that will be passed directly to the jQuery.animate() method that is used to actually move our sticky element across the screen. These default settings worked particularly well for me as I was developing the plugin, and are the values used for its implementation on this very blog.
Lastly, we have the closeChar, closeTop and closeRight options, which control the positioning of the trigger, which will unstick the scrolling element (setting it back to its static position) if the unstick option is set to true. closeChar simply allows the user to tell the plugin what character string to use as the trigger, while closeTop and closeRight offer a bit of precision control for tweaking the placement of the trigger in the top right corner of our scrolling element.
Now, if we felt so inclined, we could easily add further options that would also allow us to chose how we want to align the trigger vertically (top/bottom) and horizontally (left/right). This is something I may add into a future version.
Next, we want two lines of simple code to initialize options that can be retrieved later, by the rest of the plugin.
var options =  $.extend(defaults, options);
var $getObject = $(this).selector;
In the first line, we are basically merging the values of the defaults object that we created with the options passed to the plugin method. Any option that has been explicitly supplied will be retained, while any option that is not supplied will be set to its default value. By doing this, we will now have a single, unified options object that we can reference as required.
In the second line, we’re basically accessing the selector that we used to target the scrolling element and storing that value to a variable. We will be using this value in the actual animation, which is the next step in the process.
Now stick with me here! This block of code may seem complex at first glance, but the logic is really simple. Here is the code, which I have colour coded to help break it down:
jQuery(window).scroll(function() {
  if(jQuery(window).scrollTop() > (jQuery($getObject).parent().offset().top) &&
  (jQuery($getObject).parent().height() + jQuery($getObject).parent().position().top - 30) > (jQuery(window).scrollTop() + jQuery($getObject).height())){
    jQuery($getObject).animate({ top: (jQuery(window).scrollTop() - jQuery($getObject).parent().offset().top) + "px" },
    { queue: options.queue, easing: options.easing, duration: options.duration });
  }
  else if(jQuery(window).scrollTop() < (jQuery($getObject).parent().offset().top)){
    jQuery($getObject).animate({ top: "0px" },
    { queue: options.queue, easing: options.easing, duration: options.duration });
  }
});
If we use the colour coded areas as guideline, we can translate this into normal language to read:
[When jQuery sees the window scroll] {
  if(the top of the window is GREATER than the top of the element) AND
  (the bottom of the parent is GREATER than the bottom of the element){
    animate element to({ set top position to match the value top of the window },
    { setting queue, easing and duration });
  }
  else if(the top of the window is LESS than the top of the element){
    animate element to({ set top position to 0 },
    { setting queue, easing and duration });
  }
});
Hopefully that actually makes sense to you. It’s really pretty simple. Basically, whenever the window scrolls, jQuery will execute this function. It will check to see if the top of the window is greater in value (meaning the user has scrolled past) the top of the selected element. If it is, then one condition is met. However, the function also checks to make sure that the bottom of the element does not extend past the bottom of its parent. If both of these conditions return true, the function will then trigger an animation which will reposition the element to the top of window.
One thing that is probably worth noting is how we determine the bottom values. As far as I have been able to tell, jQuery does not have a native method to return the bottom of an element the way it returns the top. However, it is relatively easy to compute based on information that we can get. If we take the current top position of the element and add it to the full height of the element, that will actually give us the bottom position.
For example, if our element is sitting 130px from the top of the document and has a height of 445px, then the bottom position can be calculated as 130 + 445, which equals 575. Thus, the bottom of the element would be sitting at 575px from the top of the document, and we would not want the bottom of our scrolling element to move beyond that.
Alright, now we have most of our code written, and if you were to test out the plugin at this point, it should be able to display the sticky scroll behaviour that we are looking for. The only thing left to do is to include the necessary code to make the unstick trigger display. We will do this by adding an extra bit of HTML to the bottom of our scrolling element and then using some generated CSS to control the positioning. Additionally, we will wrap the entire procedure in a conditional statement, so that it will only trigger when the unstick option is set to true.
if(options.unstick == true){
  this.css('position','relative');
  this.append('');
  jQuery($getObject + ' .scrollFixIt').css('position','absolute');
  jQuery($getObject + ' .scrollFixIt').css('top',options.closeTop + 'px');
  jQuery($getObject + ' .scrollFixIt').css('right',options.closeTop + 'px');
  jQuery($getObject + ' .scrollFixIt').css('cursor','pointer');
  jQuery($getObject + ' .scrollFixIt').click(function() {
    jQuery($getObject).animate({ top: "0px" },
    { queue: options.queue, easing: options.easing, duration: options.duration });
    jQuery(window).unbind();
    jQuery('.scrollFixIt').remove();
  });
}
The .append() and .css() methods are fairly self explanatory. The important one is the .click() method, which binds the included function to the trigger. This way, when someone clicks it, jQuery will immediately scroll the sticky element back up to its default position. It will then use .unbind() to deactivate the scroll listener from the window and the .remove() method to delete the generated trigger.
And that’s pretty much it! I will note that in the actual plugin, I placed the conditional unstick code before the scroll listener (though it could also go after it with no real effect). It was, however, the last bit of code that I wrote, so it made sense to save it to the end to talk about.
Regardless, if you want to see how it all together, why not download the plugin for yourself?
The download package contains both full and minified versions of the .js file, along with a demo page which explains the various options that can be used to configure each initialization of the plugin’s functionality. If you want to check out the demo page without actually downloading the entire package, I’ve also uploaded it here
You might also like


Tags
accordion accordion menu animation navigation animation navigation menu carousel checkbox inputs css3 css3 menu css3 navigation date picker dialog drag drop drop down menu drop down navigation menu elastic navigation form form validation gallery glide navigation horizontal navigation menu hover effect image gallery image hover image lightbox image scroller image slideshow multi-level navigation menus rating select dependent select list slide image slider menu stylish form table tabs text effect text scroller tooltips tree menu vertical navigation menu