jQuery Mac dock style flexibility menu
 13 years ago
  18748
18748  4467
4467
 n/a
n/a

Just about every website uses the regular navigation concepts we’re all used to. After awhile this can get pretty boring, especially for designers who thrive on creativity. While mimicking the OS X dock and stacks isn’t new, it’s certainly not common.
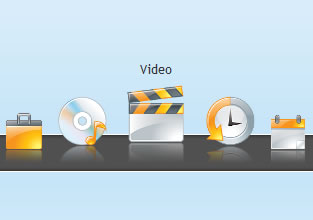
jQuery OS X Dock #1 (Horizontal)
The first dock we’ll build uses the jQuery Fisheye Menu plugin mentioned above. It’s pretty lightweight (~7kb with dependencies) but the main reason I wanted to use this one was because it’s incredibly smooth, no stuttering.
The HTML
We’ll wrap our images and titles in links and place them within a containing div. Then we’ll wrap it all in another containing div for it to function properly.
<div id="dock">
<div class="dock-container">
  <a class="dock-item" href="index.html"><span>Example 1</span><img src="http://nettuts.s3.amazonaws.com/358_jquery/images/dock/home.png" alt="home"></a>
  <a class="dock-item" href="example2.html"><span>Example 2</span><img src="http://nettuts.s3.amazonaws.com/358_jquery/images/dock/email.png" alt="contact"></a>
  <a class="dock-item" href="example3.html"><span>Example 3</span><img src="http://nettuts.s3.amazonaws.com/358_jquery/images/dock/portfolio.png" alt="portfolio"></a>
  <a class="dock-item" href="all-examples.html"><span>All Examples</span><img src="http://nettuts.s3.amazonaws.com/358_jquery/images/dock/music.png" alt="music"></a>
  <a class="dock-item" href="#"><span>Video</span><img src="http://nettuts.s3.amazonaws.com/358_jquery/images/dock/video.png" alt="video"></a>
  <a class="dock-item" href="#"><span>History</span><img src="http://nettuts.s3.amazonaws.com/358_jquery/images/dock/history.png" alt="history"></a>
  <a class="dock-item" href="#"><span>Calendar</span><img src="http://nettuts.s3.amazonaws.com/358_jquery/images/dock/calendar.png" alt="calendar"></a>
  <a class="dock-item" href="#"><span>Links</span><img src="http://nettuts.s3.amazonaws.com/358_jquery/images/dock/link.png" alt="links"></a>
  <a class="dock-item" href="#"><span>RSS</span><img src="http://nettuts.s3.amazonaws.com/358_jquery/images/dock/rss.png" alt="rss"></a>
  <a class="dock-item" href="#"><span>RSS2</span><img src="http://nettuts.s3.amazonaws.com/358_jquery/images/dock/rss2.png" alt="rss"></a>
 </div>

<!-- end div .dock-container -->
</div>

<!-- end div .dock #dock -->
Notice that I’ve placed the titles in span tags so we can style them as well as allow the plugin to hide/show them as necessary.
The CSS
With CSS we’ll position the dock where we want it on the page. We can’t use fixed positioning with this plugin or it won’t function properly.
 .dock-container { position: relative; top: -8px; height: 50px; padding-left: 20px; }
 a.dock-item { display: block; width: 50px; position: absolute; bottom: 0; text-align: center; text-decoration: none; color: #333; }
.dock-item span { display: none; padding-left: 20px; }
.dock-item img { border: 0; margin: 5px 10px 0px; width: 100%; }
I’ve also placed a little extra CSS in the head of the page below the CSS included above. I wrapped it in noscript tags in case a visitor doesn’t have JavaScript enabled or available, it will still be a usable navigation. I should point out that this will not validate because the noscript tag isn’t valid in the head section, even though it works in all the current browsers.
    #dock { top: -32px; }
    a.dock-item { position: relative; float: left; margin-right: 10px; }
    .dock-item span { display: block; }
The JavaScript
We’ll bring in our JavaScript files now starting with jQuery 1.3.2. The fisheye-iutil.min.js file is the combination of the Fisheye plugin and its dependent iutil.js file. We’ll create the last file and put our JavaScript necessary to initialize the dock in it.
<script type="text/javascript" src="http://ajax.googleapis.com/ajax/libs/jquery/1.3.2/jquery.min.js"></script>
<script type="text/javascript" src="js/fisheye-iutil.min.js"></script>
Now we’ll initialize the dock once the page loads. You can use several plugin options to customize the dock as you need for positioning and functionality. You can view the documentation by visiting the site listed under sources for the Fisheye plugin.
$(function () {
 // Dock initialize
 $('#dock').Fisheye(
  {
   maxWidth: 30,
   items: 'a',
   itemsText: 'span',
   container: '.dock-container',
   itemWidth: 50,
   proximity: 60,
   alignment : 'left',
   valign: 'bottom',
   halign : 'center'
  }
 );
});
That’s all there is to it!
You might also like
Tags
accordion accordion menu animation navigation animation navigation menu carousel checkbox inputs css3 css3 menu css3 navigation date picker dialog drag drop drop down menu drop down navigation menu elastic navigation form form validation gallery glide navigation horizontal navigation menu hover effect image gallery image hover image lightbox image scroller image slideshow multi-level navigation menus rating select dependent select list slide image slider menu stylish form table tabs text effect text scroller tooltips tree menu vertical navigation menu

 Subscribe
 Follow Us


