 Subscribe
 Follow Us
Using the Wonderful jFlow Plugin JQuery
 13 years ago
 10692
10692 1848
1848
Download The Plugin
As always with a new plugin, the first step is to visit the creator’s website and download the plugin. All that you’ll need is a tiny Javascript file – and of course a copy of the jQuery core library. While you’re at the site, take a few moments to go over the concepts. You’ll be amazed at how simple the implementation is, relatively speaking (or typing?).
Implementation
After you’ve saved the Javascript file to your hard drive, import into a new web application like so.
<script type="javasript" src="js/jQuery1.2.6.js"></script>
<script type="javascript" src="js/jFlow.js"></script>
* Note that you should be importing the core library before jFlow. Otherwise, you’ll get some obvious errors!
To use the jFlow plugin, you’ll need to understand the function of some ids and classes.
- div#controller: This element will serve as our “hook” when calling our jQuery.
- .jFlowControl: These spans will be children of the #controller div. For as many slides as you have, you must create associated span tags with this class. For example, if I had five slides, I must have five tags with a class of .jFlowControl. You’ll understand this more by example, shortly.
- div#slides: Within the slides div, you need to nest additional divs that contain your desired content for each “slide”. More on this later.
- .jFlowPrev, .jFlowNext: These two classes allow you to continue to the next slide, or vice versa.
Sample HTML Document
<div id="wrap">
<div id="controller">
<span class="jFlowControl">No 1 </span>
<span class="jFlowControl">No 2 </span>
<span class="jFlowControl">No 3 </span>
</div>
<div id="prevNext">
<img src="images/prev.png" alt="Previous" class="jFlowPrev">
<img src="images/next.png" alt="Next" class="jFlowNext">
</div>
<div id="slides">
<div><img src="images/1.jpg">
Here is a featured image. Nice!
</div>
<div><img src="images/2.jpg">
Here is another neat featured image. Nice!
</div>
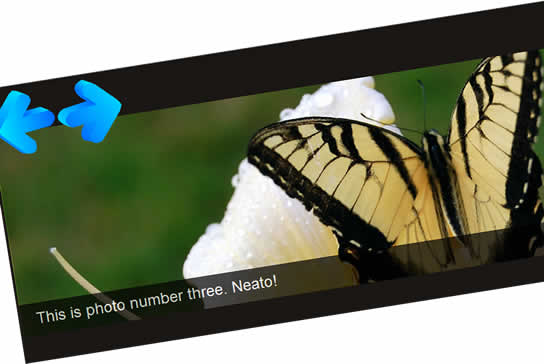
<div><img src="images/3.jpg">
Here is one last very cool featured image. Nice!
</div></div>
</div>
<!-- end wrap -->
Let’s go over this a bit.
- As with most pages, we’ve wrapped our entire contents in a “wrap” element. This is purely for aesthetic reasons. It’s not required.
- In my controller div (which is the hook for jFlow), I’ve added three span tags with a class of “jFlowControl”. Think of these spans as tabs. If you click “No 3″, it will quickly cycle to the third associated “slide”. Remember, the number of span tags that you have must be equal to the number of divs within your “slide” div. Note that both have three.
- Moving along, we now come to a div with an id of “prevNext”. This isn’t a key id, I could have named it Rick if I had wanted. It’s simply a wrapper div so that I can control where my “Next” and “Previous” buttons go on the page. The class name of the images are important however: ‘jFlowPrev’, ‘jFlowNext’.
- Last, we come to the “slides” div. Within this div, we’ll place children divs. Each of these children will serve to be one “tab”. Once again, note that if I wanted to add a fourth image, I would also need to an additional “jFlowControl” span tag within the controller div.
jQuery
The code that we have to write is quite simple. First, review the final script, and then I’ll go over each line.
$(function() {
    $("#controller").jFlow({
        slides: "#slides",
        width: "980px",
        height: "313px",
        duration: 600
    });
});
That’s it!. First, we’re waiting for when the document is ready to be traversed. Then, we grab our controller div and call the “jFlow” method. There are many parameters available to us, but we’ll just use a few.
- Slides: It’s asking, “What is the name of the div element that contains each slide – or tab? We’ll associate it with the appropriate “slides” div that I created earlier. But, you can change it if you like.
- Width, Height: These are required. In this example, I’m only using images. As a result, I’ve set the width and height values equal to those of the images.
- Duration: In milliseconds, how long do you want the transition from slide to slide take? I’ve set 600 – which is about one half of a second.
You’re Finished
The only other thing that you’ll want to implement is some CSS styling. However, jFlow will work perfectly without it. That would obviously only be for aesthetic reasons.
You might also like


Tags
accordion accordion menu animation navigation animation navigation menu carousel checkbox inputs css3 css3 menu css3 navigation date picker dialog drag drop drop down menu drop down navigation menu elastic navigation form form validation gallery glide navigation horizontal navigation menu hover effect image gallery image hover image lightbox image scroller image slideshow multi-level navigation menus rating select dependent select list slide image slider menu stylish form table tabs text effect text scroller tooltips tree menu vertical navigation menu