 Subscribe
 Follow Us
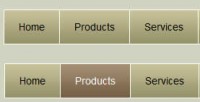
imitating kwicks nice menu jQuery Plugin
 13 years ago
 14506
14506 2046
2046

Step One
Let’s start writing our markup .
<html>
 <head>
  <title>JS Effect</title>
 </head>
 <body>
  <ul>
   <li><a href="#"><img src="images/products.jpg" alt=""/></a></li>
   <li><a href="#"><img src="images/history.jpg" alt=""/></a></li>
   <li><a href="#"><img src="images/news.jpg" alt=""/></a></li>
   <li><a href="#"><img src="images/urideas.jpg" alt=""/></a></li>
  </ul>
 </body>
</html>
As you see in the code above it’s just a normal html page containing a ul menu with four “li” members , each li containing linked image . Pretty simple is not it ?
Step Two
Let’s write our CSS
ul li {
 list-style-type: none;
 width: 125px;
 height: 100px;
 margin-right: 10px;
 float: left;
 overflow: hidden;
}
a img {
 border: 0;
}
The code above is pretty simple we just styled all “li” members and removed the border from linked images .
Step Three
Import the jQuery library , simply add this line in within the <head> </head> tags in your HTML .
<script src="http://code.jquery.com/jquery-latest.js"></script>
Step Four
This tells the browser to run the functions within the { } when the html document is ready .
$(document).ready(function(){

});
Step Five
$(document).ready(function(){
 $("li").mouseover(function(){
  $("li").animate({ width: "100px"}, 500 );
  $(this).animate({ width: "200px"}, 500 );
 });
});
In the code above we used the mouseover event , which means the function that follows $(”li”).mouseover will be executed only when you hover on one of the “li” members .
Then we use the animate effect $(”li”).animate({ width: “100px”}, 500 ); this means animate all “li” members using the following css properties which is width:”100px” .
After adding your new css properties you define the speed of the animation which is 500 here , you can add your own speed or you can use slow , normal , fast instead of numbers.
This will animate the “li” members from width 125px predefined in the css to the new 100px width with speed of 500 milliseconds .
$(this).animate({ width: “200px”}, 500 ); – $(this) means animate the hovered “li” member to width 200px with the speed of 500 milliseconds .
Finally we close the mouseover event }); .
If you tested the code we have done so far you’ll notice that the “li” members first animate to the width of 100px then the hovered one animates to the width of 200px , and this is not good as it may cause a problem when changing the width of the “li” members to 100px the cursor may hover on another “li” member which will cause animating another “li” member , we can fix this by adding different css classes to the “li” members when hovered and when not .
so Let’s Edit the html .
Step Six
<ul>
 <li class="inactive"><a href="#"><img src="images/products.jpg" alt=""/></a></li>
 <li class="inactive"><a href="#"><img src="images/history.jpg" alt=""/></a></li>
 <li class="inactive"><a href="#"><img src="images/news.jpg" alt=""/></a></li>
 <li class="inactive"><a href="#"><img src="images/urideas.jpg" alt=""/></a></li>
</ul>
Here we have added class=”inactive” to all “li” members .
Step Seven
Now we have defined all un hovered “li” members with inactive class , jQuery give us the ability to add css classes using the Attribute addClass and removing css classes using the Attribute removeClass , we will use these Attributes in the next code .
$(document).ready(function(){
 $("li").mouseover(function(){
  $(this).removeClass("inactive");
  $(this).addClass("active");
  $("li.active").animate({ width: "200px"}, 500 );
  $("li.inactive").animate({ width: "100px"}, 500 );
 });
});
First and second line we explained before .
Third line $(this).removeClass(”inactive”); mean remove “inactive” css class from hovered “li” member .
Fourth line $(this).addClass(”active”); mean add “active” css class to hovered “li” member .
Fifth line $(”li.active”).animate({ width: “200px”}, 500 ); animates the active hovered “li” member to the new 200px width with speed of 500 millisecond.
Sixth line $(”li.inactive”).animate({ width: “100px”}, 500 ); animates the inactive unhovered “li” member to the new 100px width with speed of 500 millisecond .
Then we close our events .
Step Eight
Approximately we are done , but there’s a problem which is when we hover on one of the “li” it animates to the new width of 200px and the other unhovered “li” members to the new 100px width and this is not good because when take the cursor away of the “li” member , all the “li” members stay with new widths , we want them animate back to the original widths when we take the cursor away of the “li” members , so we have to write the next code after $(”li”).mouseover(function(){ … });
$("li").mouseout(function(){
 $(this).removeClass("active");
 $(this).addClass("inactive");
 $("li").animate({ width: "125px"}, 500 );
});
In the above code we used a new event called mouseout which mean do the involved function when taking the cursor away of “li” member .
Second line $(this).removeClass(”active”); means remove the “active” css class from the was hovered “li” member .
Third line $(this).addClass(”inactive”); means add the “inactive” css class to the was hovered “li” member .
Fourth line $(”li”).animate({ width: “125px”}, 500 ); animates all the “li” members to the original width of 125px with the speed of 500 milliseconds .
After that we close the mouseout event .
Extra Step
Be creative , we’ve created so far just a width expanding ul menu , you can add height to the animate effect function and your ul menu will expand in both dimensions .
Here’s will be the new jquery code
$(document).ready(function(){
  $("li").mouseover(function(){
   $(this).removeClass("inactive");
   $(this).addClass("active");
      $("li.active").animate({ width: "200px",height: "120px"}, 500 );
     $("li.inactive").animate({ width: "100px",height: "100px"}, 500 );
    });
    $("li").mouseout(function(){
   $(this).removeClass("active");
   $(this).addClass("inactive");
     $("li").animate({ width: "125px",height: "100px"}, 500 );
  });
});
You might also like


Tags
accordion accordion menu animation navigation animation navigation menu carousel checkbox inputs css3 css3 menu css3 navigation date picker dialog drag drop drop down menu drop down navigation menu elastic navigation form form validation gallery glide navigation horizontal navigation menu hover effect image gallery image hover image lightbox image scroller image slideshow multi-level navigation menus rating select dependent select list slide image slider menu stylish form table tabs text effect text scroller tooltips tree menu vertical navigation menu