 Subscribe
 Follow Us
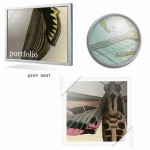
Annotation Overlay Effect with jQuery
 13 years ago
 11438
11438 1706
1706

we will create a simple overlay effect to display annotations in e.g. portfolio items of a web designers portfolio.
The Markup
The HTML is pretty simple: we have a main “portfolio” wrapper where we add the “portfolio_item” elements. Each of the elements has an “image_wrap” with the screenshot of the website, and a “zoom_overlay” with an image of the website notes inside:
<div class="portfolio">
 <div class="portfolio_item">
  <div class="image_wrap">
   <img src="images/website1.jpg" alt="Website1"/>
  </div>
  <div class="zoom_overlay">
   <img src="images/website1_notes.png" alt="Website1Notes"/>
  </div>
 </div>
 ...
</div>
Let’s style the whole thing.
The CSS
We will start by styling the big portfolio wrapper:
.portfolio{
 width:500px;
 margin:0 auto;
 position:relative;
}
The portfolio items will have the following style:
.portfolio_item{
 position:relative;
 margin:30px auto;
}
The image_wrap div that contains the screenshot that we see initially, will have a table-cell display because we want to center the image inside vertically:
.image_wrap{
 width:500px;
 height:500px;
 display:table-cell;
 text-align:center;
 vertical-align:middle;
 position:relative;
 cursor:pointer;
}
We will center the image horizontally by saying text-align:center. This works because an image has a default display of “inline”.
We will add a nice shadow around the image:
.image_wrap > img{
 vertical-align:middle;
 margin:0 auto;
 position:relative;
 -moz-box-shadow:1px 1px 7px #000;
 -webkit-box-shadow:1px 1px 7px #000;
 box-shadow:1px 1px 7px #000;
}
For our jQuery effect, we will want to animate the width of the image. The horizontal alignment should make the image be in the middle but the text-align property is not enough. We also need to add the auto margins to the sides to make the animation work.
The overlay div will be place absolutely, since we want it to appear on top of the image. To center it, we will apply the 50% negative margins trick:
.zoom_overlay{
 width:400px;
 height:400px;
 margin:-200px 0px 0px -200px;
 background:transparent url(../images/overlay.png) repeat top left;
 position:absolute;
 top:50%;
 left:50%;
 display:none;
 opacity:0;
 -moz-border-radius:10px;
 -webkit-border-radius:10px;
 border-radius:10px;
 cursor:pointer;
 filter:progid:DXImageTransform.Microsoft.Alpha(opacity=0);
}
The opacity is set to 0 because we will want to animate it when we show it.
The image with the notes will be hidden initially:
.zoom_overlay img{
 display:none;
}
And that’s the style! Let’s add the magic!
The JavaScript
The main idea behind the effect is to make the screenshot smaller and make an overlay with the annotations appear on top of it.
In our jQuery function we will first store the main div in a variable:
var $portfolio = $('#portfolio');
Then we define what happens when we click on the screenshot. We will animate the image’s height and width and make the overlay appear. The overlay will animate in opacity, width, height and in margins since we want it to be centered. Remember, we were positioning it absolutely with a top and left of 50%:
$portfolio.find('.image_wrap').bind('click',function(){
 var $elem = $(this);
 var $image = $elem.find('img:first');
 $image.stop(true)
    .animate({
   'width' :'400px',
   'height':'400px'
    },250);

 //the overlay is the next element
 var opacity = '1';
 if($.browser.msie)
  opacity = '0.5'
 $elem.next()
   .stop(true)
   .animate({
   'width'  :'500px',
   'height' :'500px',
   'marginTop' :'-250px',
   'marginLeft':'-250px',
   'opacity' :opacity
  },250,function(){
   //fade in the annotations
   $(this).find('img').fadeIn();
  });
});
Now, we will define what happens when we click on the overlay. We will want it to disappear and make the image animate back to its initial size:
$portfolio.find('.zoom_overlay').bind('click',function(){
 var $elem = $(this);
 var $image = $elem.prev()
        .find('img:first');
 //hide overlay
 $elem.find('img')
   .hide()
   .end()
   .stop(true)
   .animate({
   'width'  :'400px',
   'height' :'400px',
   'marginTop' :'-200px',
   'marginLeft':'-200px',
   'opacity' :'0'
   },125,function(){
   //hide overlay
   $(this).hide();
   });

 //show image
 $image.stop(true)
    .animate({
   'width':'500px',
   'height':'500px'
    },250);
});
And that’s it!
You might also like


Tags
accordion accordion menu animation navigation animation navigation menu carousel checkbox inputs css3 css3 menu css3 navigation date picker dialog drag drop drop down menu drop down navigation menu elastic navigation form form validation gallery glide navigation horizontal navigation menu hover effect image gallery image hover image lightbox image scroller image slideshow multi-level navigation menus rating select dependent select list slide image slider menu stylish form table tabs text effect text scroller tooltips tree menu vertical navigation menu