 Subscribe
 Follow Us
Multiple Image Cross Fade with jquery
 14 years ago
 45250
45250 4762
4762
Getting Started
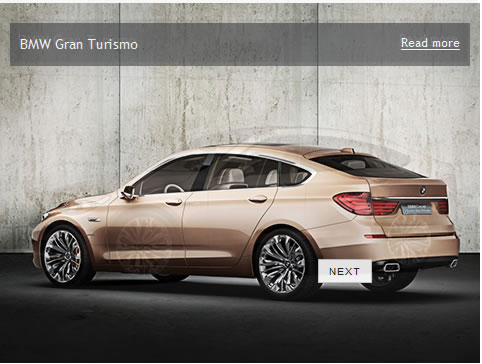
What we want to do first is to create mark-up for the content. Like this:
<div class="container">
 <img src="bmw_3.jpg" alt="" />
 <img src="bmw_2.jpg" alt="" />
 <img src="bmw_1.jpg" alt="" />
 <span><a href="[removed];">Read more</a> BMW Gran Turismo</span>
</div>
As you see, images are placed in reverse order as they will be absolute positioned and the last one will be visible first. We've used a div for container here, but we could just as easily use li or span elements.
We also need some CSS for layout and basic styling for captions.
.container {
 position: relative;
 width: 480px;
 height: 360px;
 margin: 0 auto;
}

.container img {
 position: absolute;
 top: 0;
 left: 0;
 z-index: 10;
}

.container span {
 position: absolute;
 top: 20px;
 left: 10px;
 width: 440px;
 padding: 10px;
 background: url('bg.png');
 color: #FFF;
 z-index: 11;
}

.container span a {
 float: right;
 color: #FFF;
 font-size: 12px;
}
Take notice of z-index for images, we will manipulate it to create continuous loop effect. Now, with our HTML and CSS in place, it's time for the fun stuff. Here's the JavaScript code for creating fading, we'll go through it in detail afterwards.
$(".container img:first-child").addClass('last');

$(".container img").click(function() {
 $(this).fadeOut('normal', function() {
  if ( $(this).hasClass('last') ) {
   $("img", $(this).parent()).css('z-index', 10);
  } else {
   $(this).css('z-index', 9)
  }
  $(this).show();
 });
});
First, we add class last to the first child of each container (this will help us later). Next, we add click event for each image. When the user clicks on the image, it starts fading-out. When animation completes, we check if it has class last. If so - we reset z-index for each image in the container, otherwise we set lower z-index for this image. Finally, we reset opacity; it still will not be visible as it now has lower z-index.
Adding tooltip
Next step is to add tooltip indicating to click for next image. There are no element for tooltips inside containers, we will add them dynamically instead.
// show tooltip when the mouse is moved over container
$(".container").mouseenter(function() {
 $(".tooltip", this).show();

}).mousemove(function(e) {
 // update position
 $(".tooltip", this).css({
  'top' : e.pageY - this.offsetTop + 8,
  'left' : e.pageX - this.offsetLeft + 15
 });

}).mouseleave(function() {
 $(".tooltip", this).hide();

}).append('<div class="tooltip">Next</div>');

// hide tooltip when the mouse is moved over caption
$(".container span").mouseenter(function() {
 $(".tooltip", $(this).parent()).hide();

}).mouseleave(function() {
 $(".tooltip", $(this).parent()).show();
});
We also need some CSS for our tooltips.
.tooltip {
 position: absolute;
 display: none;
 padding: 3px 10px;
 background: #fff;
 color: #222;
 border: 1px solid #CCC;
 font-family: Arial;
 font-size: 10px;
 text-transform: uppercase;
 letter-spacing: 1px;
 z-index: 11;
}
You might also like


Tags
accordion accordion menu animation navigation animation navigation menu carousel checkbox inputs css3 css3 menu css3 navigation date picker dialog drag drop drop down menu drop down navigation menu elastic navigation form form validation gallery glide navigation horizontal navigation menu hover effect image gallery image hover image lightbox image scroller image slideshow multi-level navigation menus rating select dependent select list slide image slider menu stylish form table tabs text effect text scroller tooltips tree menu vertical navigation menu