 Subscribe
 Follow Us
Multiple CSS Decorative Gallery
 13 years ago
 15513
15513 2739
2739
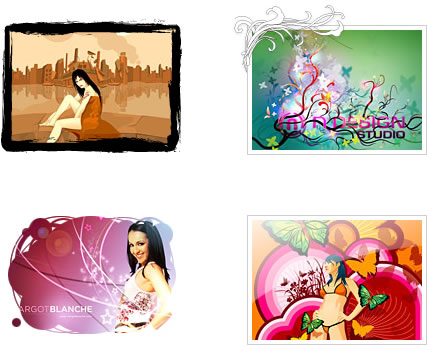
I will show you how to decorate your images and photo galleries without editing the source images. The trick is very simple. All you need is an extra <span> tag and apply a background image to create the overlaying effect. It is very easy and flexible — see my demos with over 20 styles, from a simple image icon to a rounded corner to a masked layer (both decorative and complex).
What Are The Benefits Of This CSS Trick?
- Saves Time — You don’t have to manually create the decorative template in Photoshop and export the individual image.
- Keeps Original Source Images — So you don’t have to worry about changing the design theme in the future.
- Very Flexible — You can have a completely different look and feel by just editing the CSS.
- It Works on Any Site — This CSS trick works on any type of site, with any image size.
- Cross-Browser CompatIble — It has passed the test on most browsers (Firefox, Safari, Opera, and even the "buggy IE6").
Basic Concept ()
You need to insert an extra <span> tag within the <div> tag, with which we’ll apply a background image to create the overlaying effect. If you don’t like to have an empty span tag, you can append the span tag by Javascript (I’ll show you how later in this tutorial).
Then in the CSS, the key point you have to remember is: specify the div element to position:relative and the span element to position:absolute. You can position the span element anywhere you want by using the top and left property.
IE PNG Hack
To make the transparent PNG image work on IE6, I use this wonderful iepngfix.htc hack. Download a copy of iepngfix.htc and insert the following code in between the <head> tag:
<!--[if lt IE 7]>
<style type="text/css">

  .photo span { behavior: url(iepngfix.htc); }

</style>
<![endif]-->
Look and Feel
To change the look and feel, simply edit the CSS specifications of the span element. Click the image below to see the demos I have. To show you how flexible it is, I’ve created 15 different styles (notice the HTML markup is same).
The jQuery Solution ()
I know some of you (particularly the web accessibility fans) don’t like to have an empty span tag in the markup. Well, I’ve solved this issue by using jQuery to append the span tag to the source code. Insert the following code in between the <head> tag:
<script type="text/javascript" src="jquery.js"></script>
<script type="text/javascript">
$(document).ready(function(){

  //prepend span tag
  $(".photo a").prepend("<span></span>");

});
</script>
You might also like


Tags
accordion accordion menu animation navigation animation navigation menu carousel checkbox inputs css3 css3 menu css3 navigation date picker dialog drag drop drop down menu drop down navigation menu elastic navigation form form validation gallery glide navigation horizontal navigation menu hover effect image gallery image hover image lightbox image scroller image slideshow multi-level navigation menus rating select dependent select list slide image slider menu stylish form table tabs text effect text scroller tooltips tree menu vertical navigation menu