 Subscribe
 Follow Us
Rollovers and tooltips with jQuery
 13 years ago
  6877
6877  2126
2126
 n/a
n/a

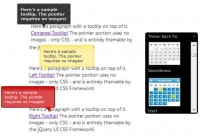
The usual stuff, mouse over an icon changes image and shows a tooltip
The markup
This is pretty straight, just an unordered list with three items and each item has a link.
<ul id="iconbar">
<li><a href="#">
<img src="key.gif" alt="" />
<span>Change your password</span>
</a></li>
<li><a href="http://feeds.feedburner.com/ilovecolors" target="_blank">
<img src="rss.gif" alt="" />
<span>Suscribe to our RSS!</span>
</a></li>
<li><a href="#">
<img src="sel.gif" alt="" />
<span>Choose your options!</span>
</a></li>
</ul>
However, inside each link we have two important blocks: the icon image and a span. On the img tag, we’ll be changing its src attribute. The span tag is what we will be using for the tooltip. Initially the img tag has a default src value and the span is hidden, when the time comes and the hover event is triggered, the img src attribute is redirected to a different location (another image) and the span is displayed showing the text you defined.
The styling
The style is a bit longer to read but we’re only styling two items: the li containter and the span block.
#iconbar li {
float:left; position:relative; margin-right:20px;
}
#iconbar span {
position: absolute;
top: -50px;
left: -80px;
display: none;
background: url(ttbg.jpg) no-repeat;
width: 110px;
height: 35px;
text-align: center;
padding: 5px;
line-height:110%;
color:#000000;
}
We’re defining an absolute position inside the relative position of our li element. Now we can assign some top and left values to position it. The values will be modified by our jQuery script later. The display is set to none, since we don’t want the span to be visible when we first open the page. The icons doesn’t require styling since we’re changing only the src attribute through jQuery.
The jQuery code
jQuery is truly amazing, with only a few lines of code we can have our icon rollover and tooltip ready. So, let’s get to it. When the DOM is ready, we’re launching a function based on the hover state of the li element within our iconbar. When it’s launched, it will get the src attribute of the image within li and it will store the name without the extension in a variable named origen.
jQuery(document).ready(function(){
$("#iconbar li").hover(
function(){
var iconName = $(this).find("img").attr("src");
var origen = iconName.split(".")[0];
Next, we assign a new path to the src attribute of img, appending “o” to the name, and the corresponding extension, in this case, “.gif”. The tooltip section begins animating its opacity to fade in and the top position (remember the values on the style sheet?).
$(this).find("img").attr({src: "" + origen + "o.gif"});
$(this).find("span").animate({opacity: "show", top: "-60"}, "normal");
},
Please, notice the comma separating the two functions. The hover event in jQuery takes two parameters: one for the mouse rollover state and one for the mouse rollout state. Now we get to the rollout state, this is what happens when the mouse rolls out of the li area. We take the image src attribute again and we split at the “o.”, the string we added on the hover event, and we redirect the src attribute to the original image path. The tooltip is animated towards a zero opacity, and we position it at the same top value that is defined in the stylesheet, in this case, 50. Notice that I haven’t added the “px” values. Don’t be as lazy as me and add them, but you can see that it still works without the “px” dimensions. We hide it fast to prevent any conflicts with any other thing. You know, when something can go wrong, it will, so don’t give it a chance.
function(){
var iconName = $(this).find("img").attr("src");
var origen = iconName.split("o.")[0];
$(this).find("img").attr({src: "" + origen + ".gif"});
$(this).find("span").animate({opacity: "hide", top: "-50"}, "fast");
});
});
Of course, some of you might be thinking that you can place anything inside that little cute span and indeed, it’s possible. For example, an icon.
<li><a href="#">
<img src="sel.gif" alt="" />
<span>Choose your options!<img src="sel.gif" alt="" /></span>
</a></li>
That’s all
You might also like

Tags
accordion accordion menu animation navigation animation navigation menu carousel checkbox inputs css3 css3 menu css3 navigation date picker dialog drag drop drop down menu drop down navigation menu elastic navigation form form validation gallery glide navigation horizontal navigation menu hover effect image gallery image hover image lightbox image scroller image slideshow multi-level navigation menus rating select dependent select list slide image slider menu stylish form table tabs text effect text scroller tooltips tree menu vertical navigation menu