 Subscribe
 Follow Us
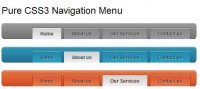
Cool navigation menu made with JQuery
 13 years ago
 7504
7504 1687
1687

HTML
   <div id='menu_holder'>
        <ul>
            <li id='first_li' class='selected'>Link1</li>
            <li id='second_li'>Link2</li>
            <li id='third_li'>Link3</li>
            <div class='clear'></div>
        </ul>
    </div>
A basic html for a navigation. Nothing much. You will notice that the list items have their own id’s because of the different background color they will have, if you don’t plan to have different background colors you don’t need it. You can see that the first item has class named “selected” which will be the selector for the current page.
CSS
    /* when we use css float element we must clear it. This tutorial doesn't cover explaining floating and clearing but if you aren't
    familiar with it i would suggest a tutorial written by Chrics Coyier at css-tricks.com. The link to the article is bellow this coding part*/
    .clear { clear: both }

    #menu_holder ul{
        list-style-type: none; /* Remove the default styling on unordered list items (the circles) */
    }
    #menu_holder ul li {
        float:left; /* Float the list items (menu items in this case) to float:left so they are positioned inline */
        width:150px; /* The default width of the list items */
    }
    #menu_holder ul li a {
    /* the next 2 lines are important because we want to whole menu item to be clickable and not just the text */
    display:block; /* important so we can set width to it */
    width:100%;   /* width of the link = width of the list item */
    /* styling you can change <img src="http://web.enavu.com/wp-includes/images/smilies/icon_smile.gif" alt=":)" class="wp-smiley">  */
    padding:10px;
    text-decoration:none;
    color:white;
    }

    /* Just styling bellow, you can make your own */
    #menu_holder ul { margin:0px; padding:0px; }
    #menu_holder ul li { color:white; font-size:20px; font-weight:bold; border:4px solid black;}
    #first_li{ background-color: #000080;}
    #second_li{ background-color: #008080;}
    #third_li{ background-color: #8080FF;}
And voila, we have our navigation. I know it doesn’t look amazing, but we are making a jquery navigation effect, not designing a navigation.
Now, the main part, JQuery…
JQuery
$(document).ready(function(){

        //declaring the varibles we will use
        var speed = 500; //speed of the animation in milliseconds
        var min_width = 150; //the minimum width of an menu item
        var max_width = 400; //the maximum width of an menu item

        //animate the default selected menu item to the max width
        $('.selected').animate( { width : max_width } );

        /* We are going to use the jquery's hover function to achieve the effect  '*/
        $('#menu_holder ul li').hover(function(){

            /*so when hovered over an item, we initiate the animate function to make
            the width of the hovered item scroll to the max_width we declared with speed we declared */
            $(this).animate({ width : max_width }, { queue:false , duration:speed});

            /* and by using siblings() we animae the rest of the menu items to the width min_width we declared */
            $(this).siblings().animate({ width : min_width }, { queue:false , duration:speed});

        //when the user hovers out
        },function(){

            //get the class of the menu item we hovered out of...
            var class_ = $(this).attr('class');

            //...and check if the class name is NOT 'selected'...
            if(class_ != 'selected'){
                //...and if it's NOT we animate the non 'selected' divs to the min_width and the 'selected' to the max_width '
                $('#menu_holder ul li').animate({ width : min_width }, { queue:false , duration:speed});
                $('.selected').animate( { width : max_width }, { queue:false , duration:speed});
            }
        });
    });
You might also like


Tags
accordion accordion menu animation navigation animation navigation menu carousel checkbox inputs css3 css3 menu css3 navigation date picker dialog drag drop drop down menu drop down navigation menu elastic navigation form form validation gallery glide navigation horizontal navigation menu hover effect image gallery image hover image lightbox image scroller image slideshow multi-level navigation menus rating select dependent select list slide image slider menu stylish form table tabs text effect text scroller tooltips tree menu vertical navigation menu